How to install a custom ISO on your cloud server
Download an ISO image to your account, boot a new or existing server from it and set up the network in the installer.
A custom ISO allows you to install an operating system that we don't currently offer as an image in our Configurator. However, if you already have your own ready-to-use disk image, you can use a custom server image instead. It also allows you to boot a rescue or live system on your server. To add a custom ISO to your account, you will need to paste in a direct link to the ISO file, which we will then automatically download. Once the download is complete, you can mount it on your server as a virtual CD drive. The server will then boot the installer after which you can proceed to follow the steps via the server's console.
You can choose to directly boot from an ISO when you deploy a new server and you can also mount one on a server that you already have.
Your account can hold up to 2 ISO files at a time, with each being up to 10 GB in size. The download link has to be a direct http or https URL that ends in .iso with no redirects, login or query parameters. Every ISO is removed 48 hours after it has been added, counting from when it has been added to the system rather than when it has been downloaded. Once the time passes, any mounted ISOs will be automatically dismounted from their respective server.
How to add an ISO fileCopy link
In the VPSBG Console, open Orchestration from the menu on the left and select ISO Files. This page will list every ISO that is currently in your account, including its size, when it has been downloaded, when it will expire and its status. Next, click Add ISO File.
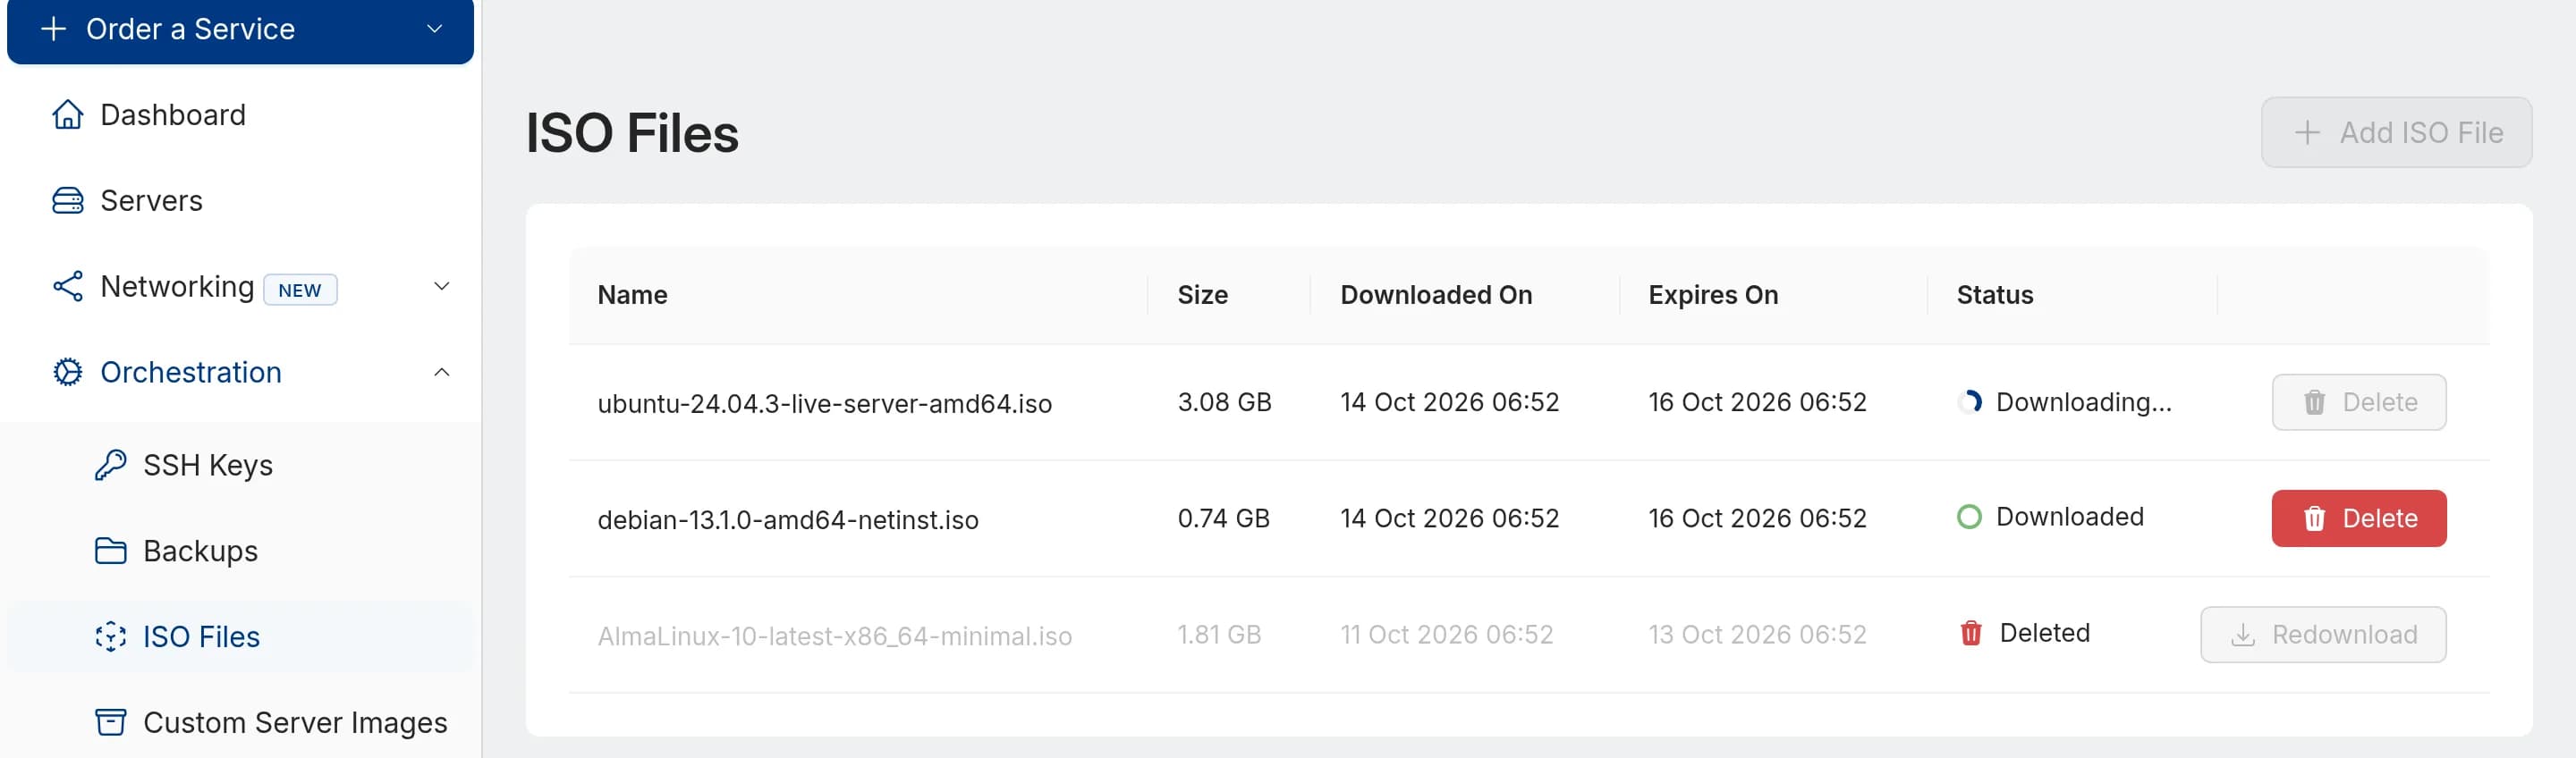
Paste the link to the ISO URL Address and click Upload. You can also open the same ISO download box with the Add ISO File button in the server configurator or in a server's Settings tab.
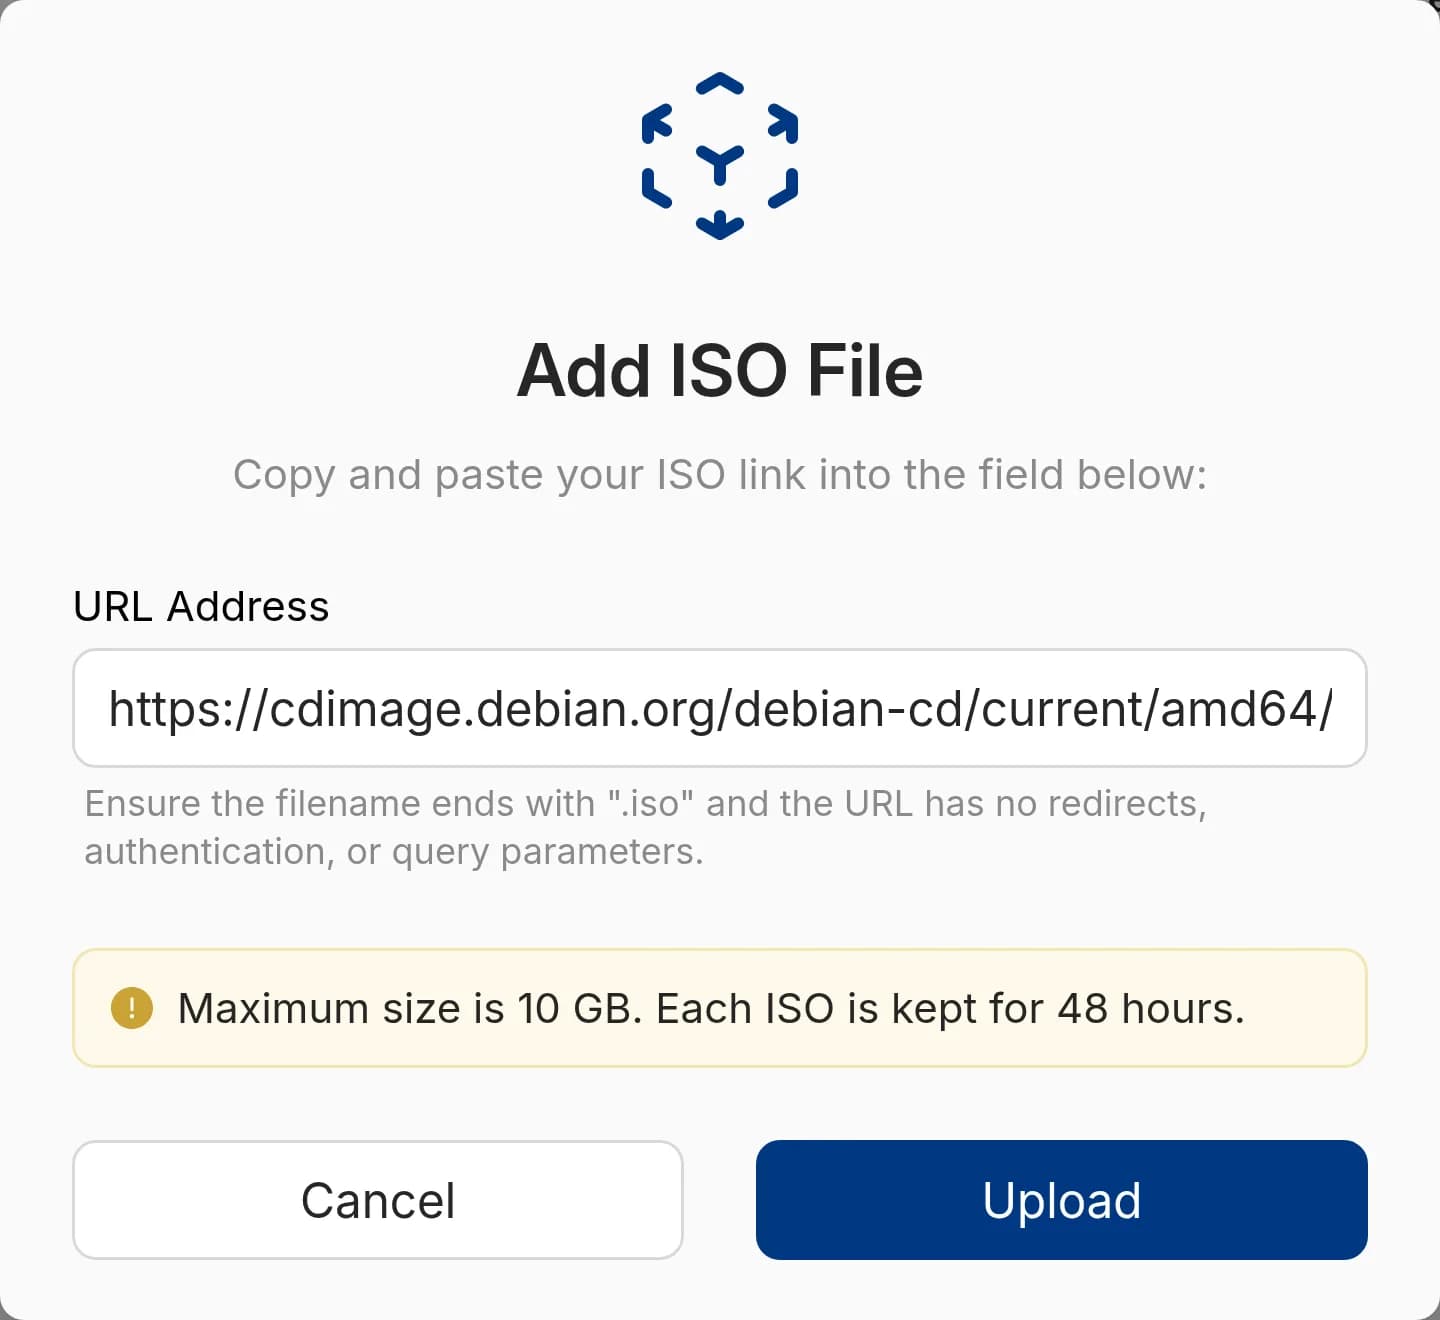
The ISO's status will then update to Downloading... and once complete, will be marked as Downloaded. Only a downloaded ISO can be mounted on a server. When you no longer need an ISO, simply click the Delete button and confirm (if the ISO is alreadu mounted and you try to delete it, you will have to confirm the deletion). A deleted or expired ISO will stay in the list and it will have a Redownload button, which you can use to redownload the ISO from the same link and restart the 48-hour retention period.
Send the link as url to Add an ISO. The token needs to have the write ability (Authentication).
curl --request POST "https://api.vpsbg.eu/v1/isos" \
  --header "Accept: application/json" \
  --header "Content-Type: application/json" \
  --header "Authorization: Bearer ${VPSBG_API_TOKEN}" \
  --data '{"url": "https://cdimage.debian.org/debian-cd/current/amd64/iso-cd/debian-13.1.0-amd64-netinst.iso"}'
Replace:
- the
urlvalue with the direct link to your ISO
The response carries the ISO's id, which you use to mount it. Get an ISO shows the download progress.
How to deploy a server from an ISOCopy link
To do this, start by clicking on the Order a Service button and selecting Deploy Server. This will take you to the service configurator where you can pick your desired hosting plan and billing period. Next, open the Custom ISO tab in the Server Image section. Then, select a downloaded ISO for the Primary ISO or download an ISO if you haven't already. If the installer needs a second disc, such as a driver ISO, add it in the Secondary ISO section.
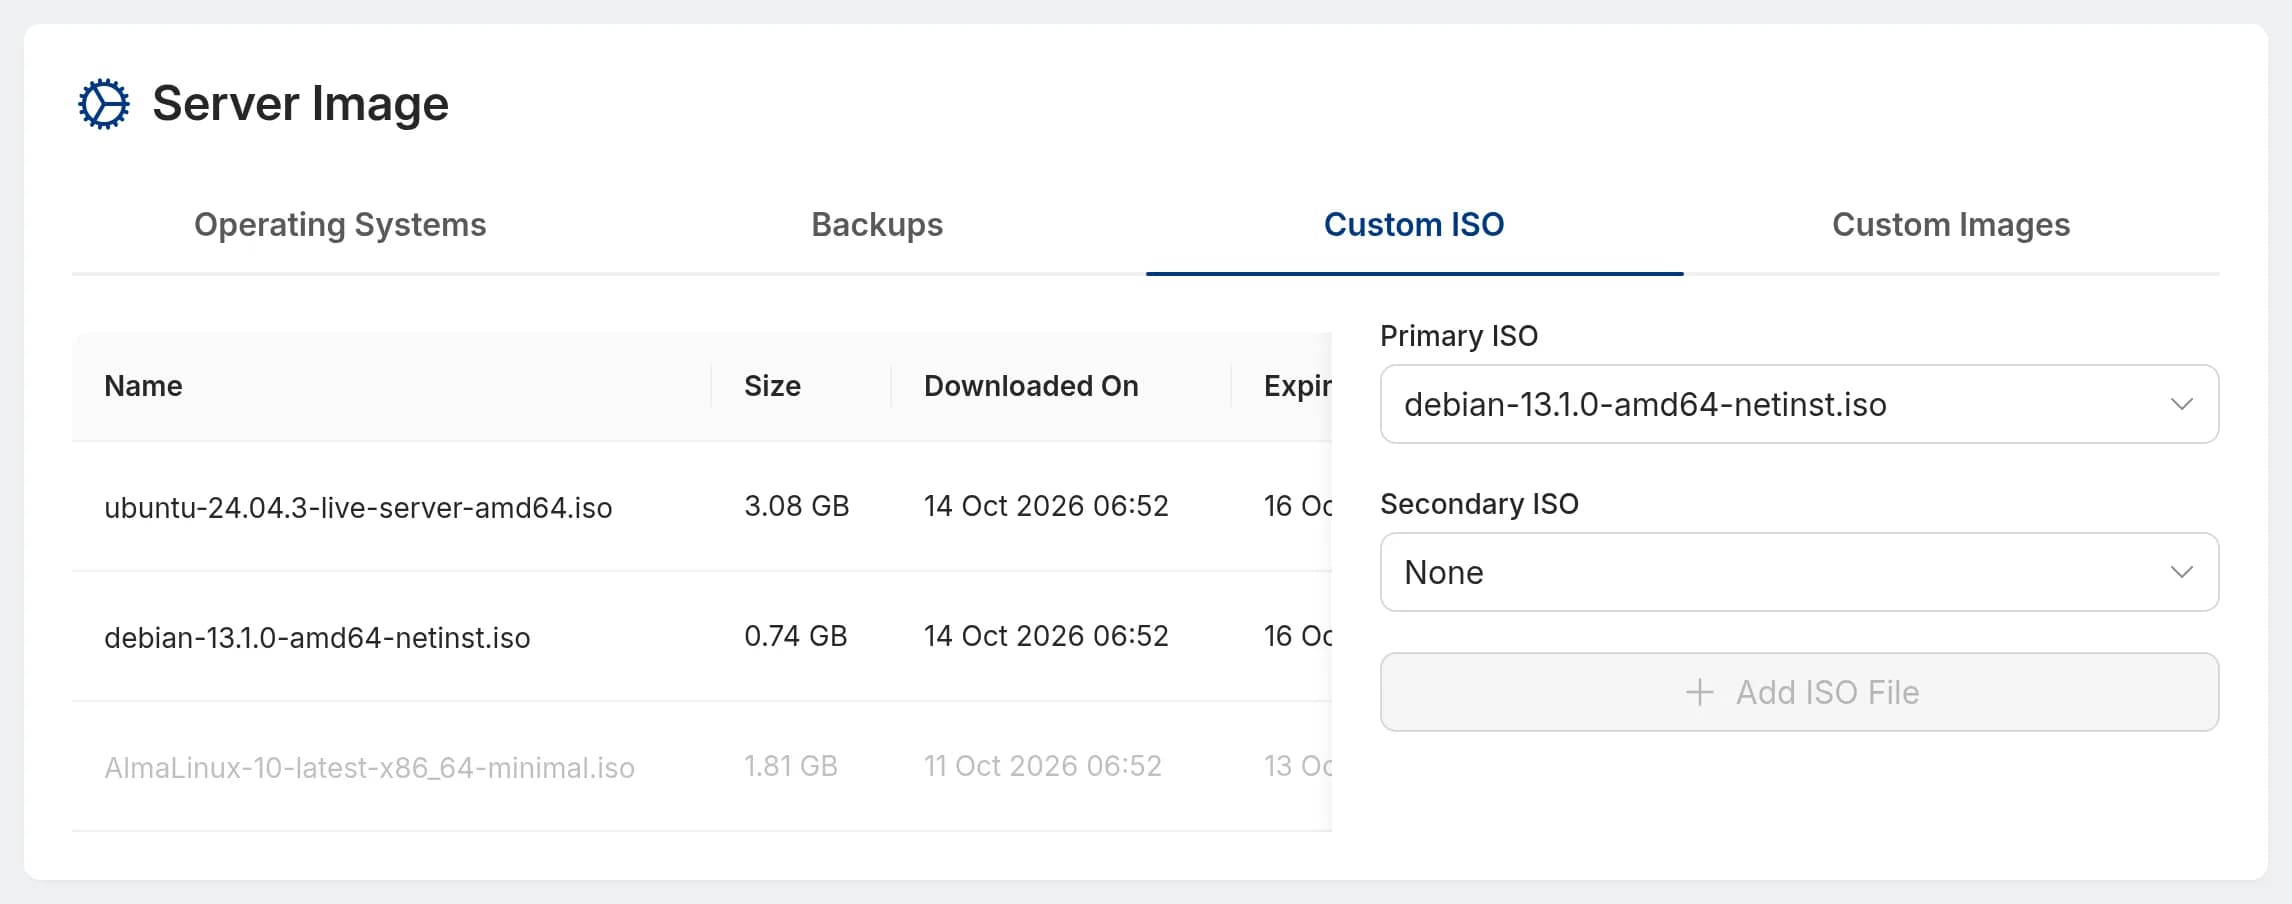
A server installed from an ISO won't have a root password, SSH keys or a startup script, which is why you will see that the Startup script section is disabled. You will need to set the credentials inside of the installer instead. Once you have completed your configuration, click Order Now. The new server will start with an empty disk and it will then boot the ISO.
Send primary_iso_id instead of image_id when you deploy a server. A second disc goes in secondary_iso_id.
curl --request POST "https://api.vpsbg.eu/v1/servers" \
  --header "Accept: application/json" \
  --header "Content-Type: application/json" \
  --header "Authorization: Bearer ${VPSBG_API_TOKEN}" \
  --data '{"name": "web-1.example.com", "plan": "cloud-vps-1gb", "billing_cycle": "1", "primary_iso_id": 7}'
Replace:
web-1.example.comwith your server's hostnamecloud-vps-1gbwith a plan'skeyfrom List plans7with theidof a downloaded ISO from List ISOs
How to mount an ISO on an existing serverCopy link
To mount an ISO on an existing server, start by opening Servers and clicking on the Manage button next to the server. Once there, you will need to open the Settings tab. In the ISO Files section, choose the custom ISO that you wish to mount for Primary ISO (and, if you need one, a second disc under Secondary ISO).
Next, select the Boot the ISOs before the server's disk option so that the server starts the installer instead of the operating system, which will already be on its disk. When this option isn't enabled, the ISO will be attached but the server will keep booting from its disk, which is useful when you only need files from the disc.
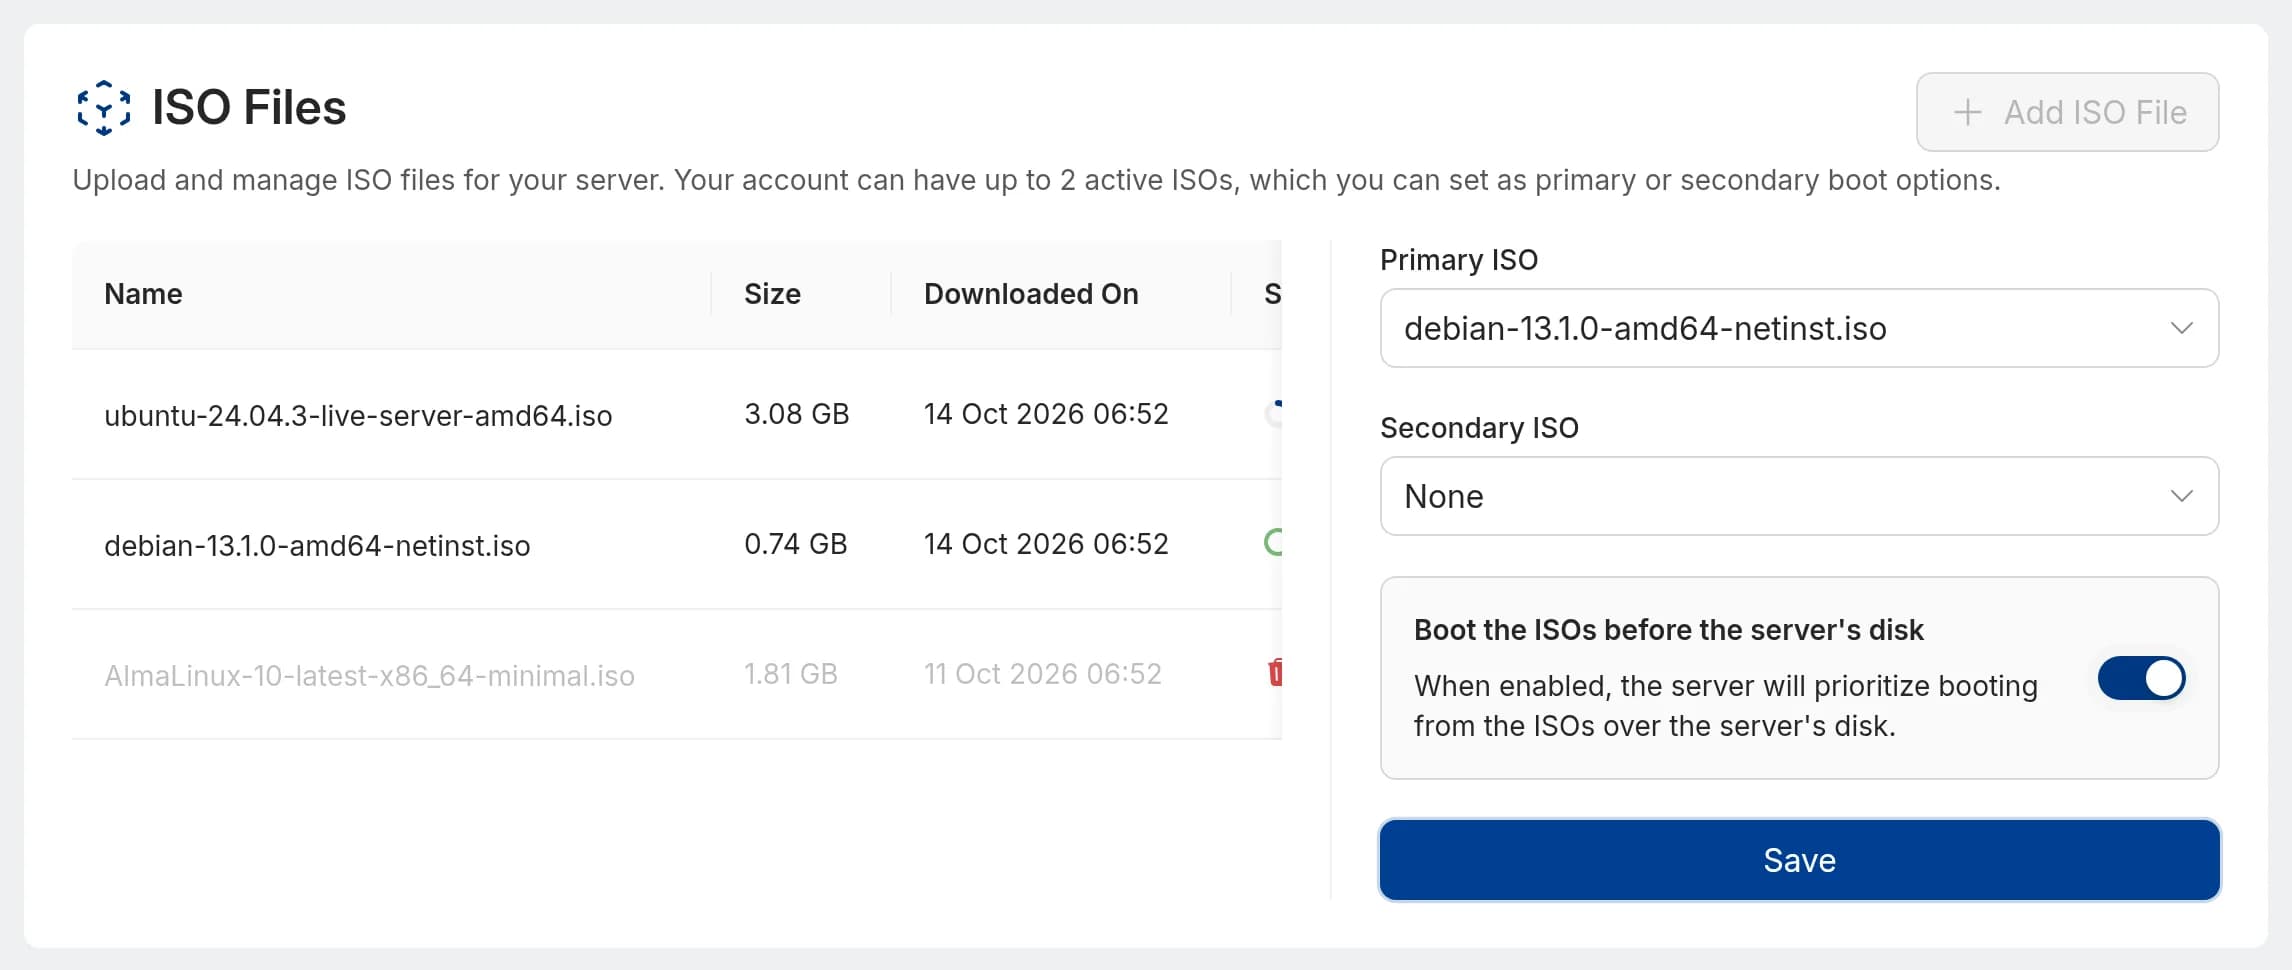
Finally, click Save and confirm. Saving will then restart the server so the change will take effect right away.
Send the ISO's id to Attach or detach ISO images. Set restart to true so that the server boots from the ISO immediately.
curl --request POST "https://api.vpsbg.eu/v1/servers/1234/isos" \
  --header "Accept: application/json" \
  --header "Content-Type: application/json" \
  --header "Authorization: Bearer ${VPSBG_API_TOKEN}" \
  --data '{"primary_iso_id": 7, "boot_from_iso": true, "restart": true}'
Replace:
1234with your server'sid7with theidof a downloaded ISO from List ISOs
If your server has AMD SEV-SNP activated, it will remain active while an ISO is mounted. Some installers fail to boot or load when is SEV-SNP active. If the installer does not boot, turn SEV-SNP off in the Settings tab for the installation and then reactivate it. Each change will restart the server.
How to set up the network in the installerCopy link
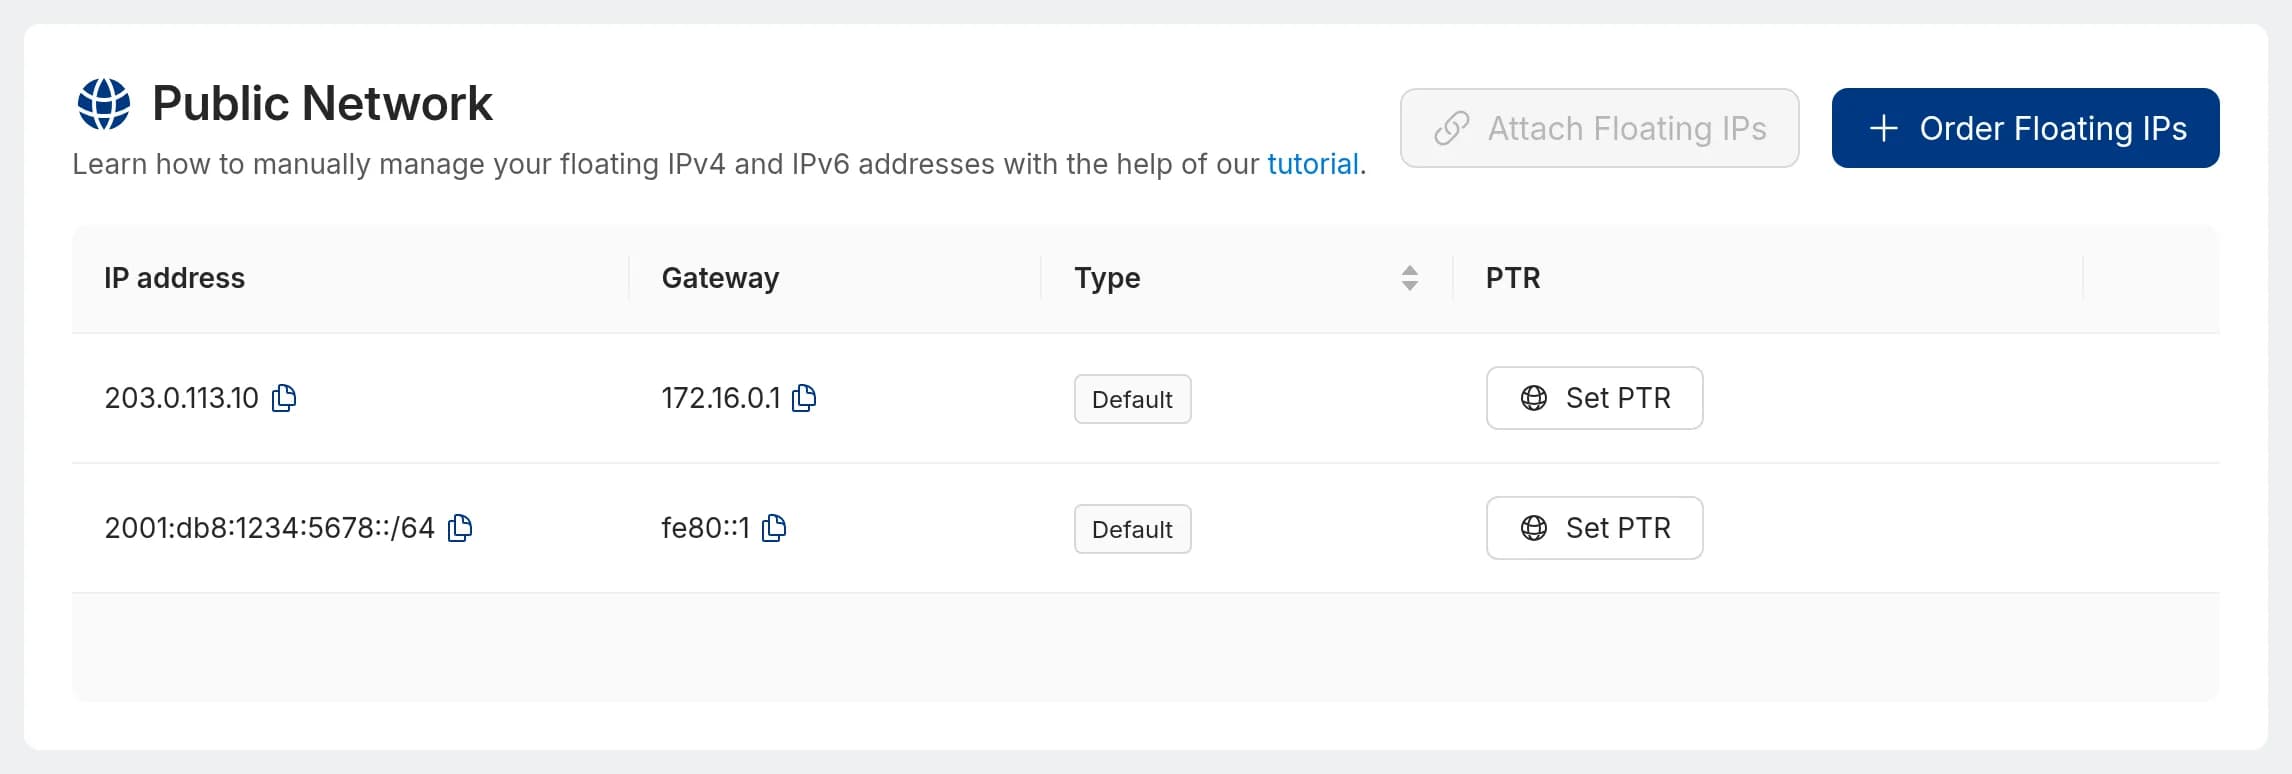
Our network does not run DHCP, so an installer that waits for an automatic address won't find any. Next, select manual (static) configuration and enter the values from the server's Networking tab, which lists every IP address with its gateway.
| Setting | IPv4 | IPv6 |
|---|---|---|
| Address | the server's IPv4 address, for example 203.0.113.10 | the IPv6 network with 1 at the end, for example 2001:db8:1234:5678::1 |
| Prefix | /32 (netmask 255.255.255.255) | /64 |
| Gateway | 172.16.0.1 | fe80::1 |
| DNS servers | two resolvers from the list below | two resolvers from the list below |
For DNS, pick a public resolver:
| Provider | IPv4 | IPv6 |
|---|---|---|
| Quad9 | 9.9.9.9, 149.112.112.112 | 2620:fe::fe, 2620:fe::9 |
| Cloudflare | 1.1.1.1, 1.0.0.1 | 2606:4700:4700::1111, 2606:4700:4700::1001 |
| Google Public DNS | 8.8.8.8, 8.8.4.4 | 2001:4860:4860::8888, 2001:4860:4860::8844 |
| OpenDNS | 208.67.222.222, 208.67.220.220 | 2620:119:35::35, 2620:119:53::53 |
The IPv4 gateway is not inside the server's /32, so the operating system has to treat it as directly reachable (on-link). Some installers refuse a gateway outside the subnet. In that case, finish the installation without addressing networking and add the configuration once the system is installed. On Ubuntu, for example, the settings above will look like this in /etc/netplan/01-static.yaml:
network:
  version: 2
  ethernets:
    ens18:
      addresses:
        - 203.0.113.10/32
        - 2001:db8:1234:5678::1/64
      routes:
        - to: default
          via: 172.16.0.1
          on-link: true
        - to: default
          via: fe80::1
      nameservers:
        addresses: [9.9.9.9, 208.67.222.222]
Replace ens18 with the interface name that ip link shows and then update the addresses with your own. A floating IP attached to the server is added the same way as another /32 address. Then, apply the file and check that the server can reach the internet:
netplan applyping -c 3 9.9.9.9You should be able to see three replies.
How to boot from the disk after the installationCopy link
The ISO will stay mounted until you remove it or until it has expired. While Boot the ISOs before the server's disk is on, every restart will start the installer again. Once the system has been installed, open the server's Settings tab, set Primary ISO to None (or turn the switch off) and click Save. The server will then restart into the operating system on its disk.