How to install Windows on a cloud server
In this tutorial, we are going to show you how to install Windows OS on your cloud server from an ISO file with Windows Server 2022 & VirtuIO drivers.
In this tutorial we are going to show you how to install Windows as an operating system on a cloud VPS server from an ISO file.
Installing Windows from an ISO is beneficial for those that seek to have greater control and flexibility over their virtual environment. It also allows you to manage encryption and set up various networking properties.
Additionally, we are also going to be setting up VirtIO drivers to ensure optimal communication between the OS and the virtualization infrastructure.
Add Windows Server & VirtIO ISO files to your VPSCopy link
For this tutorial we are going to be using 2 ISO files - Windows Server 2022 & VirtIO Drivers, which are both available from the respective sites.
You don't need to download the ISO files yourself. Copy the direct download link of each one and paste it in your server settings in the client area to add the ISO to your cloud VPS. You can also check out our tutorial on how to install a custom ISO on a cloud server for step-by-step instructions.
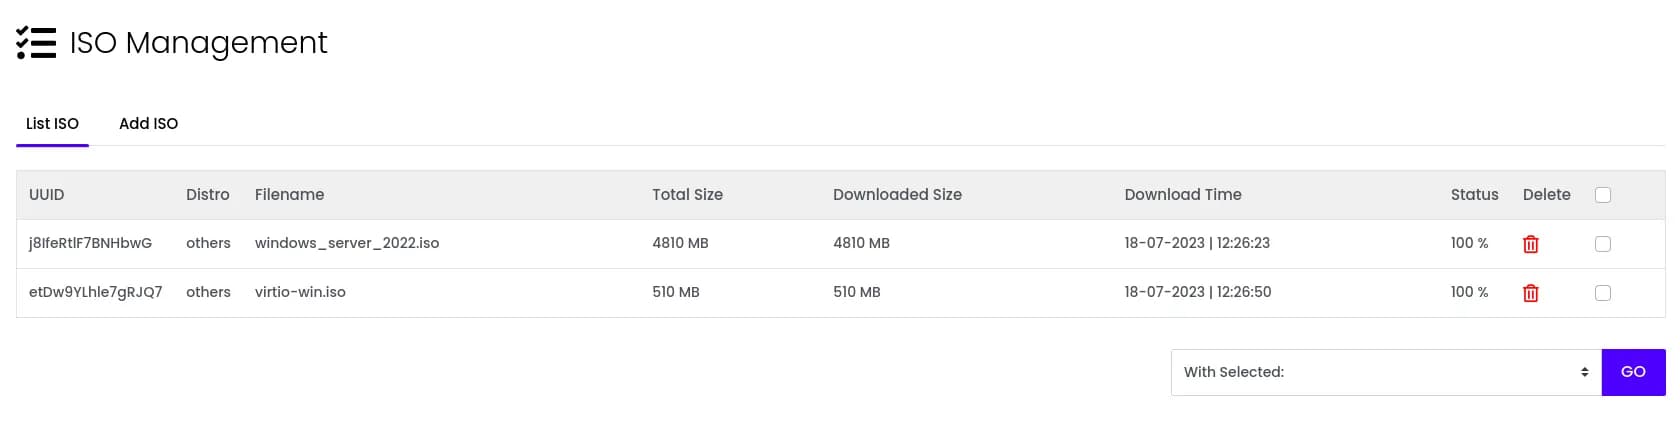
Once you have added the 2 ISO files, navigate to your Cloud VPS and open the Settings tab. Next, go to the ISO Files section. This is where you will be able to deploy both ISO files.
Make sure to select the Windows Server ISO file under the Primary ISO option and the VirtIO Drivers ISO file under Secondary ISO. After that, turn on Boot the ISOs before the server's disk. It should look similar to this:
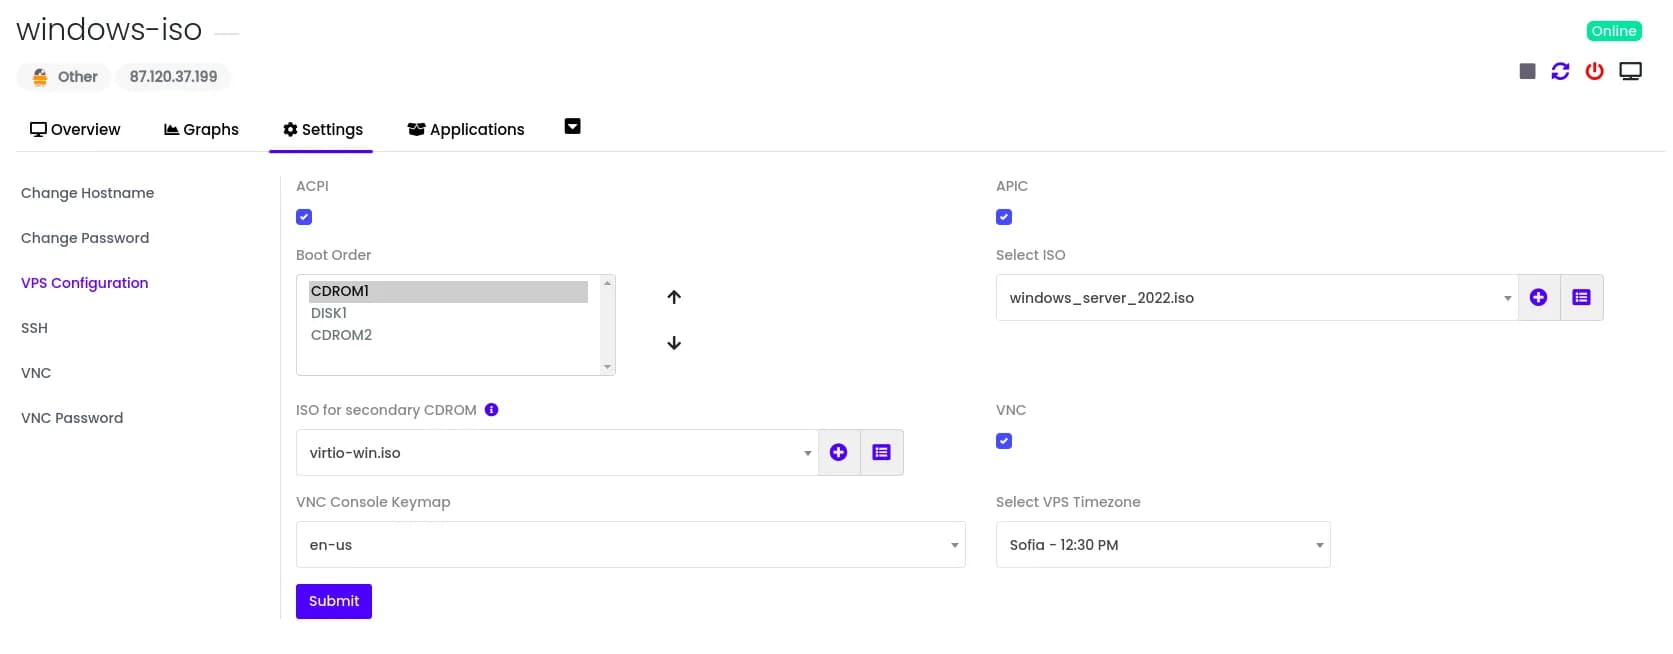
To finalize, click on the Save button and then on Confirm to restart your VPS.
Installing Windows OS on a cloud serverCopy link
Once you have rebooted your cloud server, you will need to connect to it via VNC. You can do so by clicking on the Console button at the top of your server's page in the client area. This will open up a new window with the installation setup:
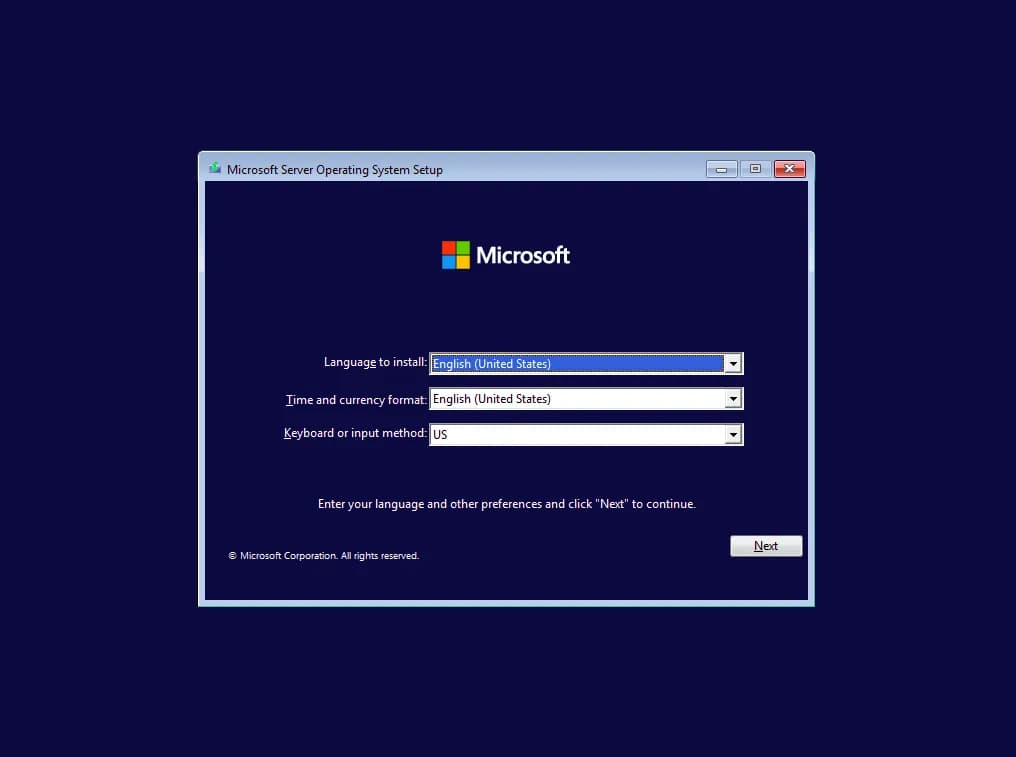
First, select your preferred language. Then click on Next and Install Now. This will initialize the setup process and will ask you to select the Windows version that you wish to install:
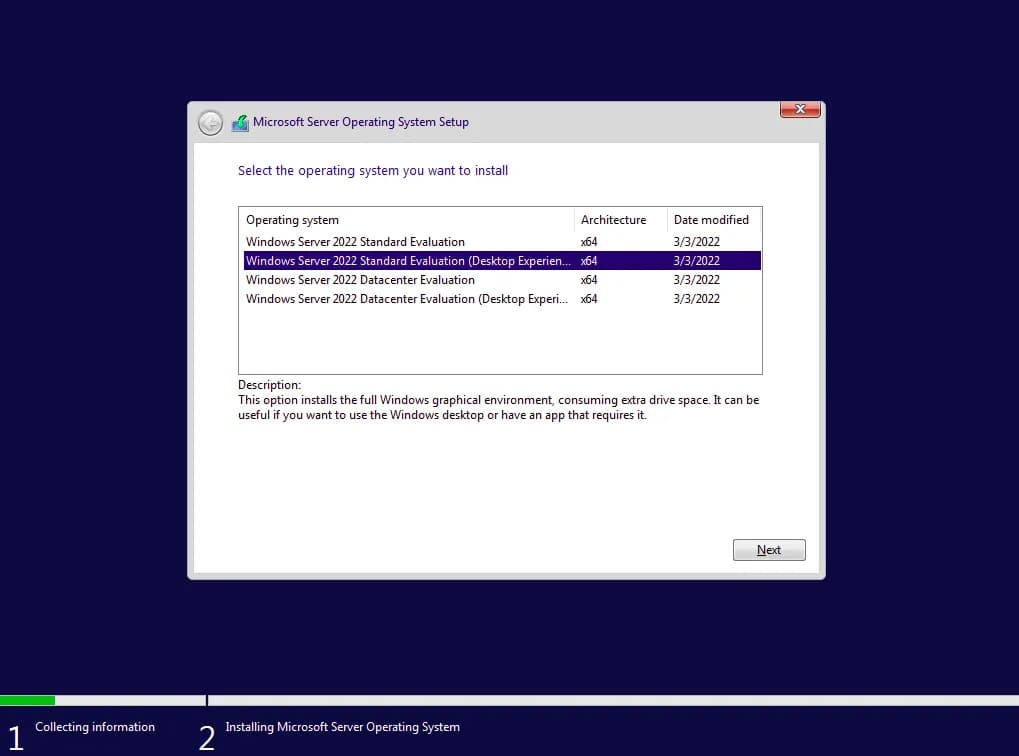
We suggest using Windows Server 2022 Standard Evaluation (Desktop Experience) because it has a full graphical user interface (GUI) similar to Windows 10. It also includes tools like File Explorer, Internet Explorer, and the Windows desktop.
However, if you'd prefer a more minimalistic Windows Server installation, opt for the first option, which offers a command-line interface rather than a full desktop environment.
Once you have selected the version, click on Next. You'll then be prompted to accept the license terms:
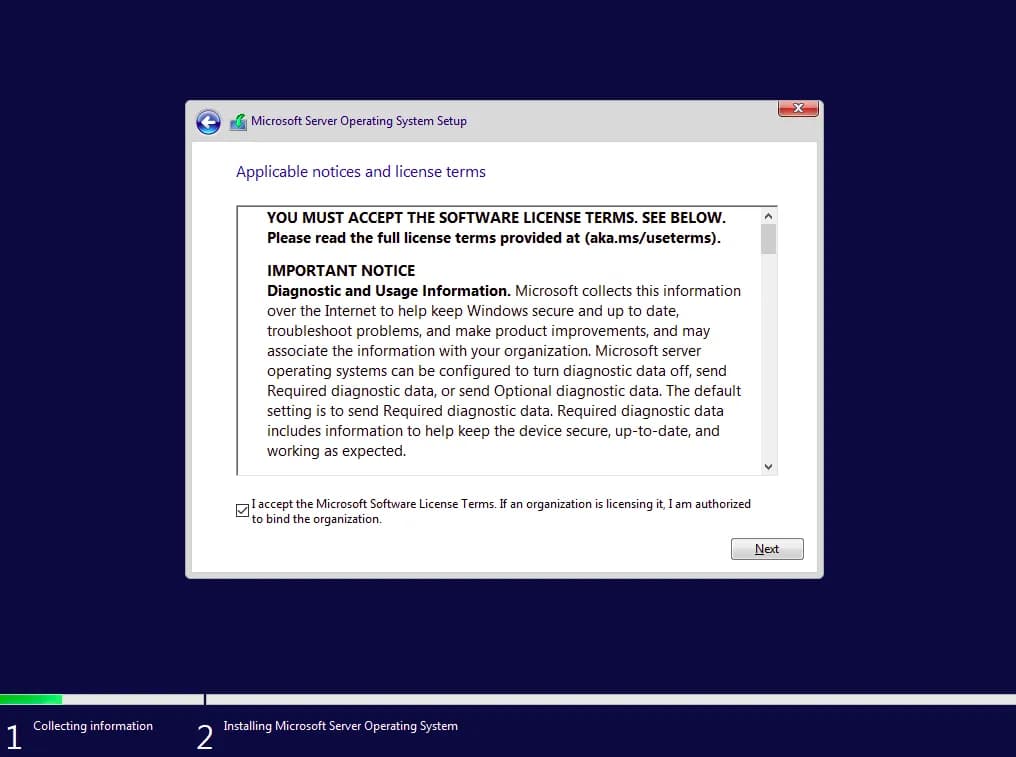
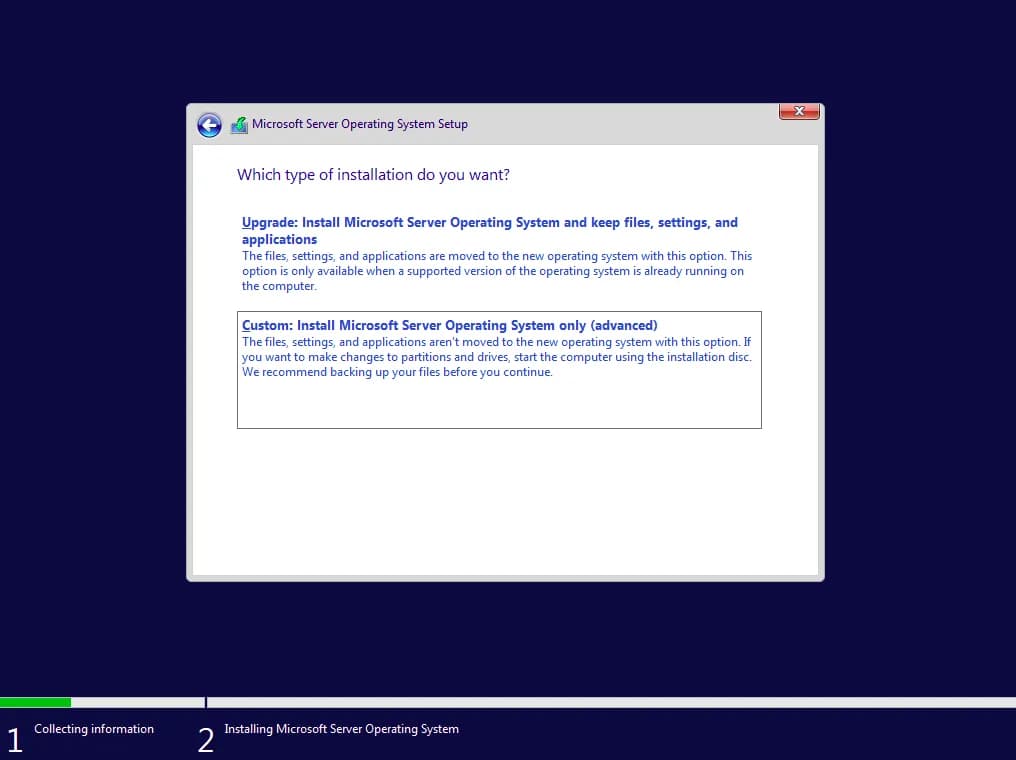
Tick the box to accept the terms and continue. You'll then be asked about the installation type. The 2 options are Upgrade and Custom. Since we don’t have any data or prior installations on our server, we need to select the Custom option.
You'll then be asked to select a drive for the Windows OS installation:
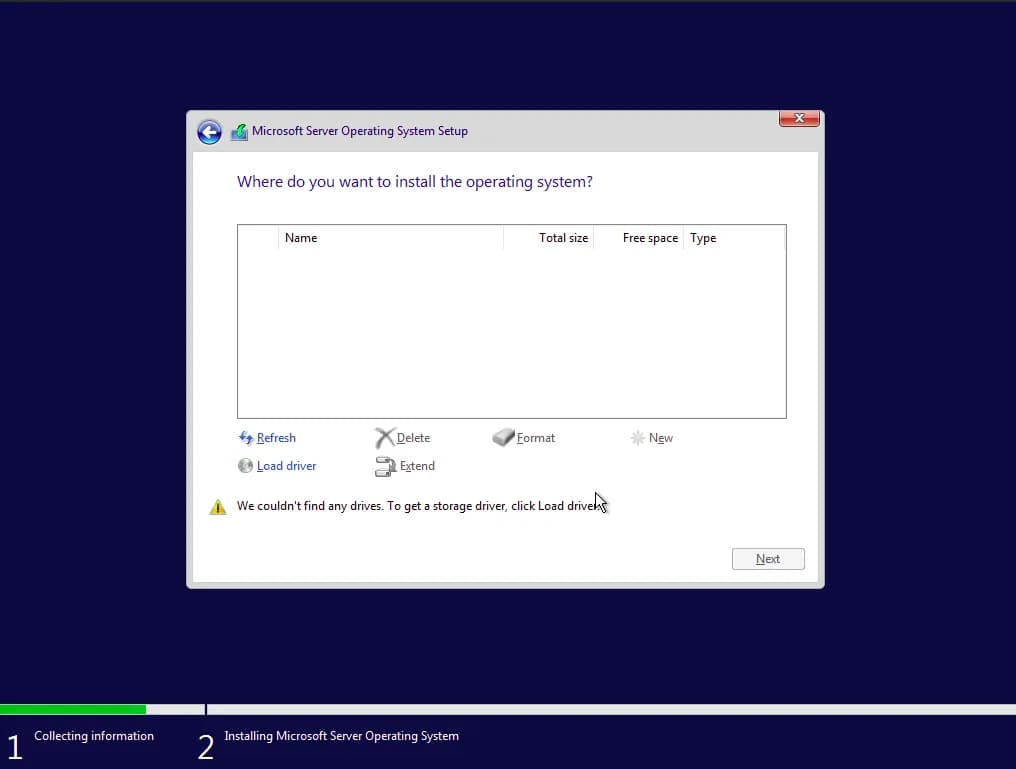
As Windows lacks the necessary drivers to communicate with the KVM virtualization platform by default, you'll notice that no disks are displayed. Don’t worry, this is where our VirtIO drivers come in. Click on Load Driver and then OK on the following popup. Choose the VirtIO version that is compatible with your Windows Server version. In this case it is going to be 2k22 because we are installing Windows Server 2022:
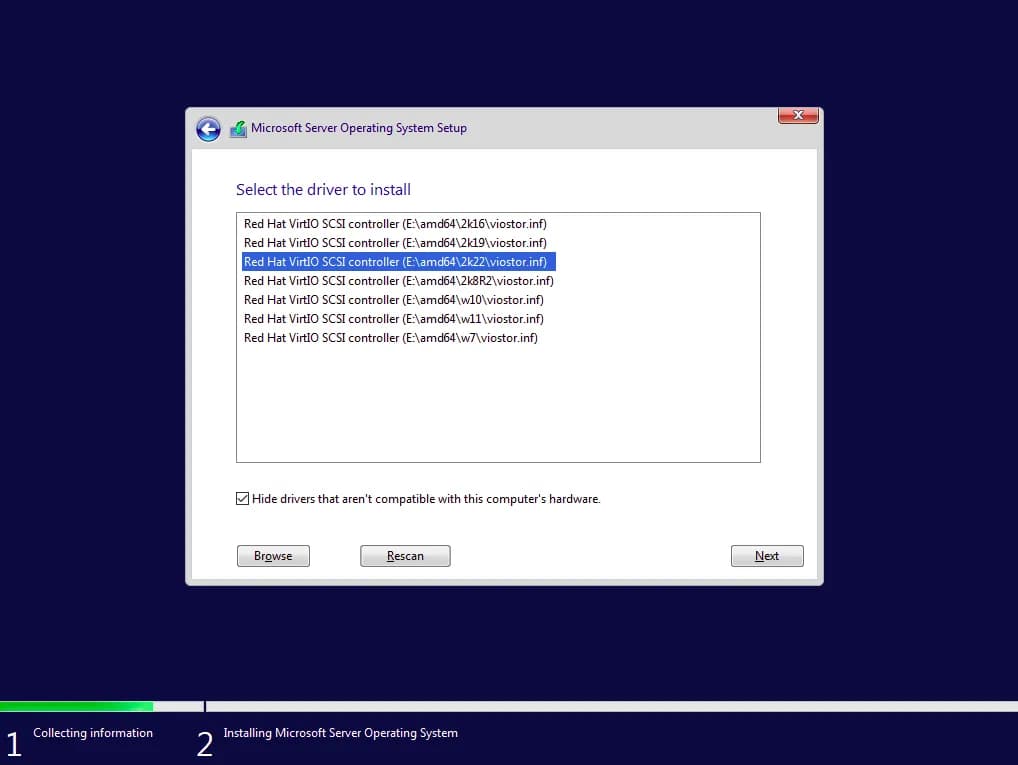
Click on Next to proceed. When you load up the VirtIO drivers, you'll be able to see your virtual disk:
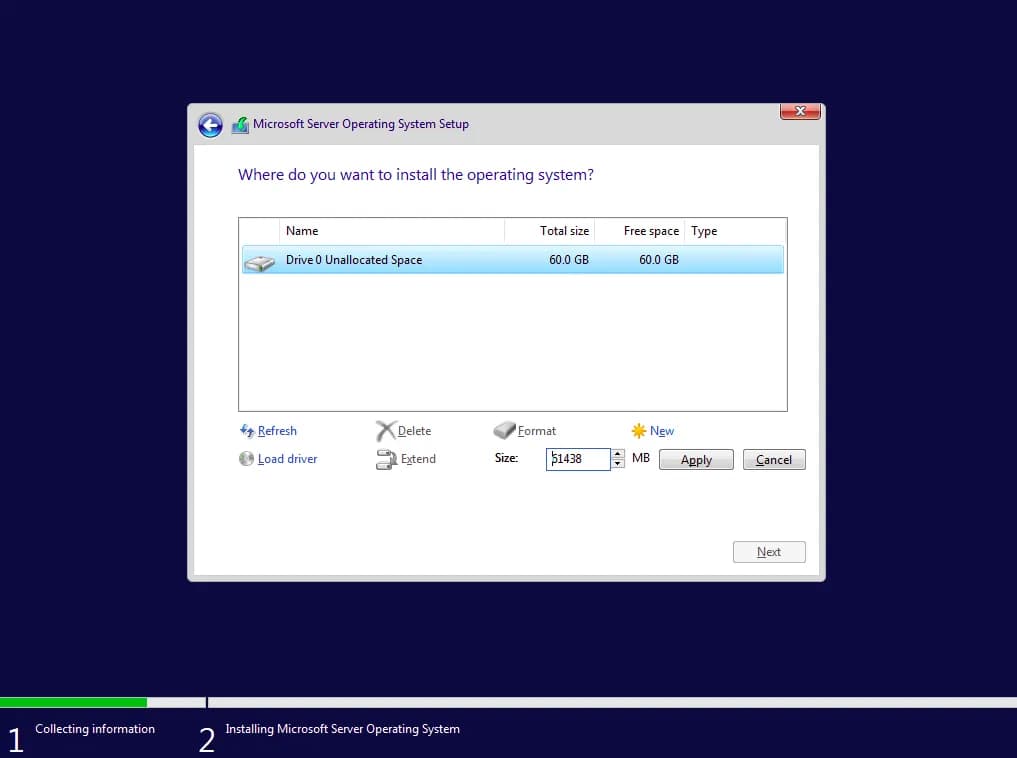
IMPOTANT: If a warning appears such as Windows cannot be installed to this disk then simply delete the partition.
You should now see the Unallocated space option. Click on New and allocate the maximum available size.
Click Apply and then OK. Two partitions will be created:
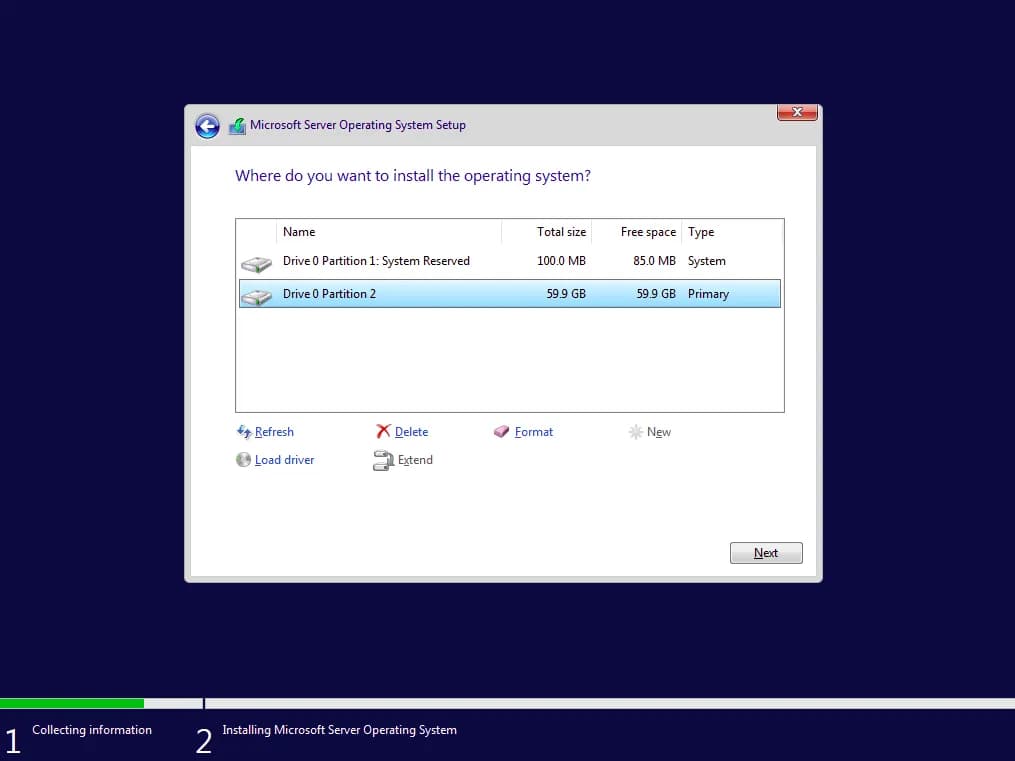
The first one is reserved by Windows and the boot manager and all other components that are needed for the system to start. Select the second one as it is our primary partition and click Next. The installation will then proceed to install Windows:
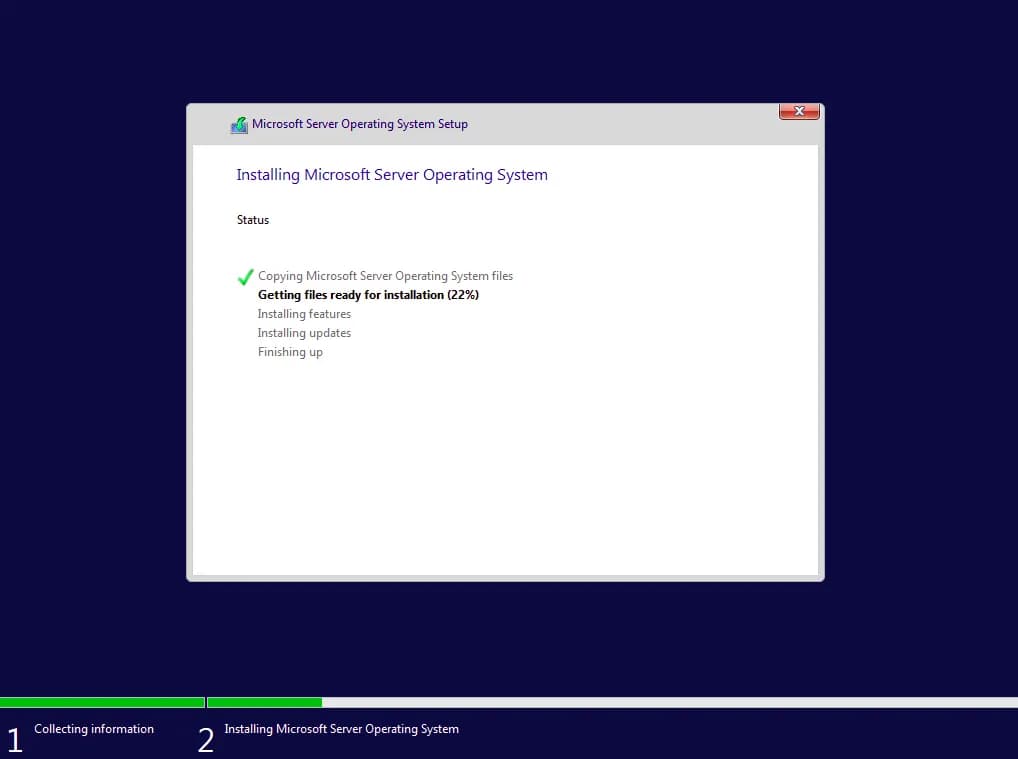
The system will automatically restart during the installation process:
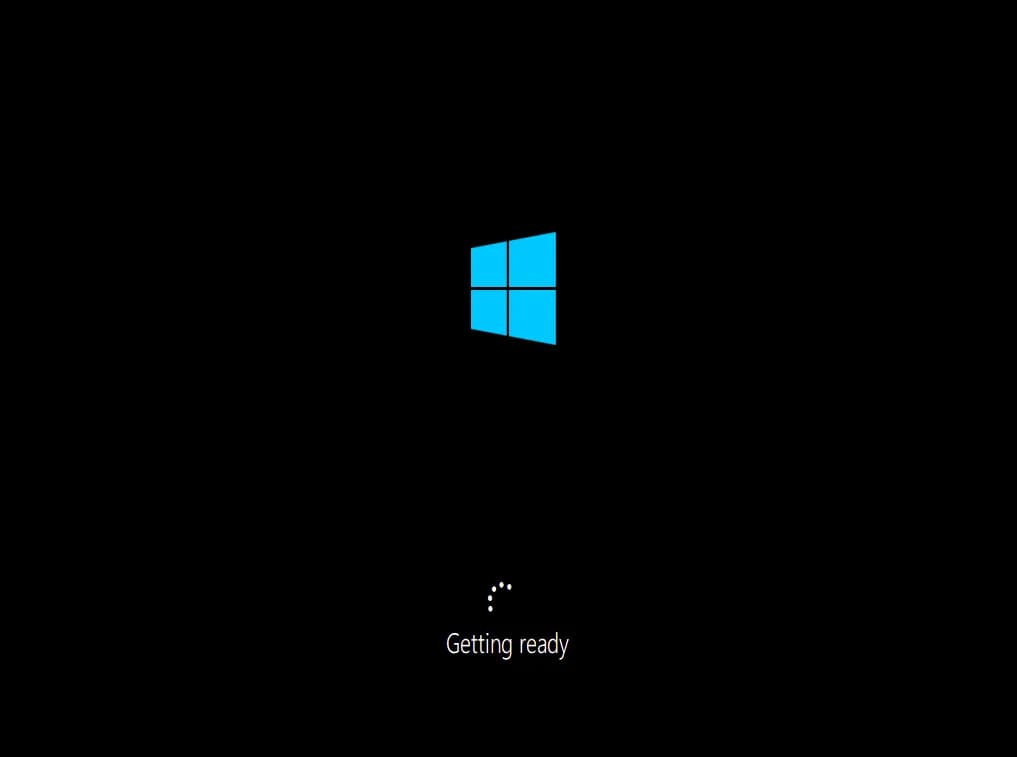
Once the installation concludes, you will be asked to create a password for the Administrator account. Don’t forget to secure a password with both lower and uppercase letters, special characters and numbers.
After selecting your password, click Finish. You will then be greeted by the Windows lock screen:
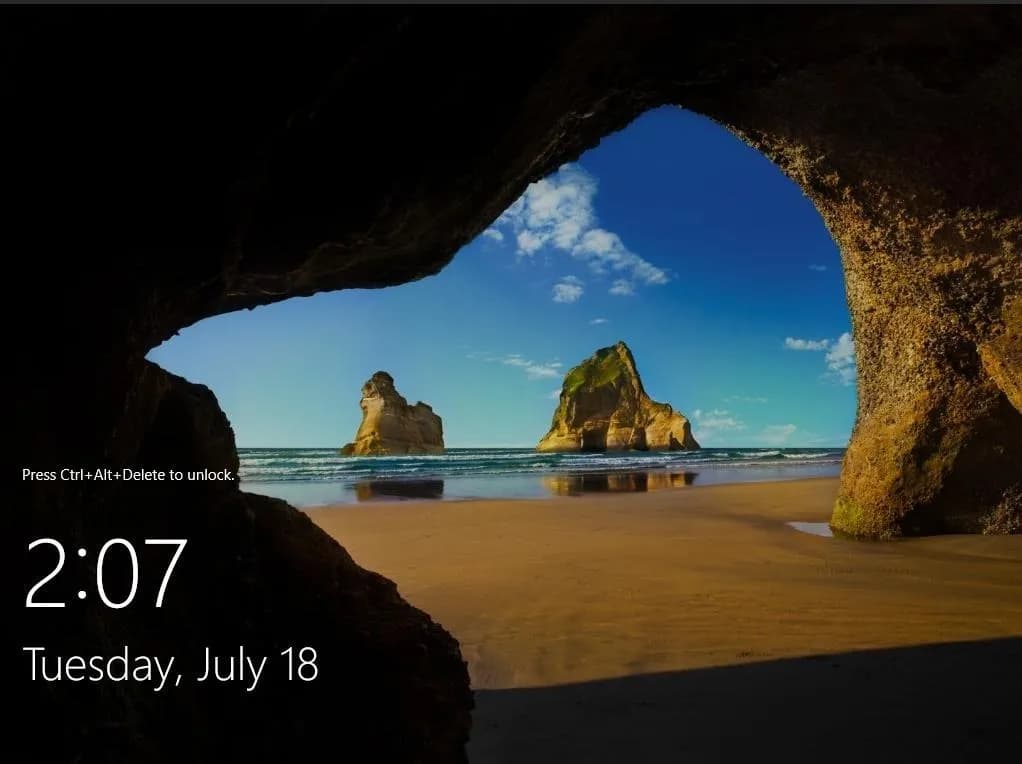
To finalize the installation of the VirtIO drivers you will need to log into your account. You can do so by opening the side NoVNC panel on your browser window. To do that, press and hold both the Ctrl and Alt keys and then press the Delete key on your keyboard:
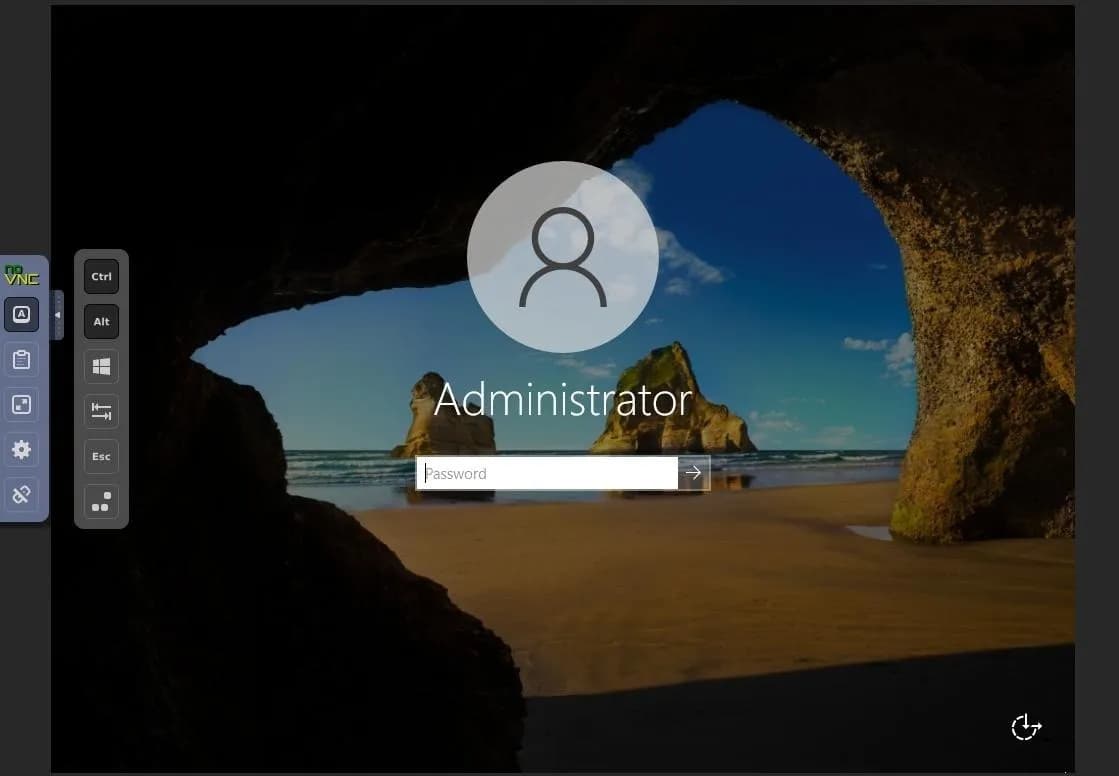
Release the keys and input your password. Then log into your account:
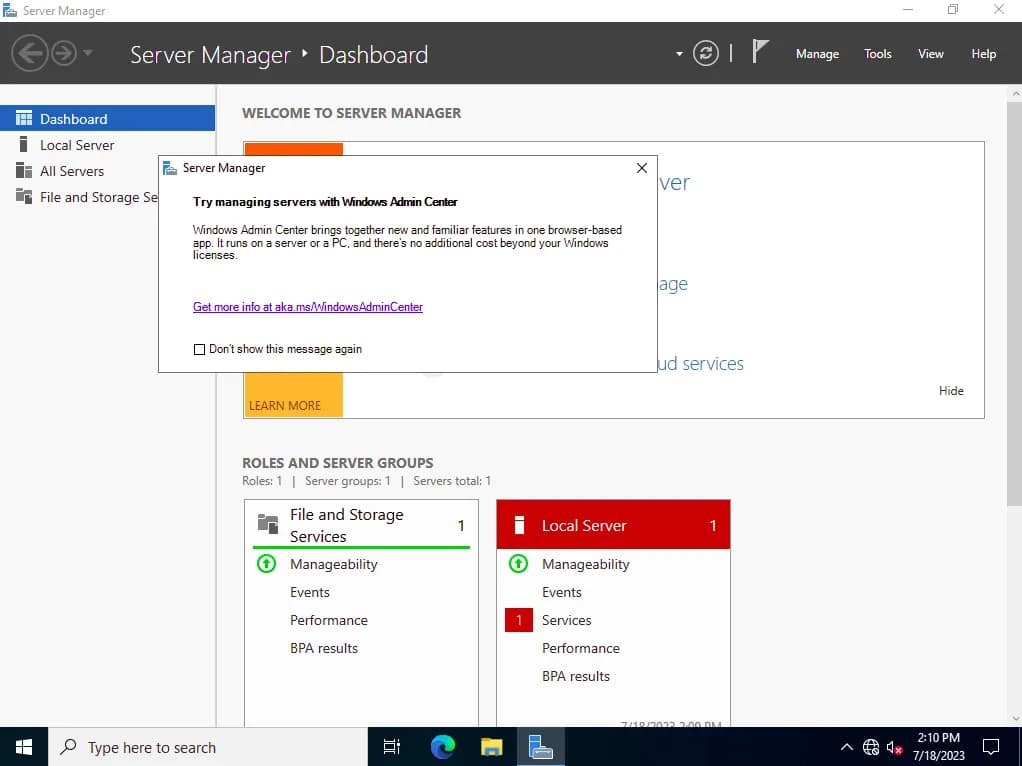
You will be presented with the Server Manager tool, which you can close. You might notice that there is no internet connection yet - this is due to the missing VirtIO drivers. To complete the installation, open the File Manager, navigate to the CD Drive (E:) virtio-win directory, and double-click the virtio-win-gt-x64 installer file, which will load up the installation:
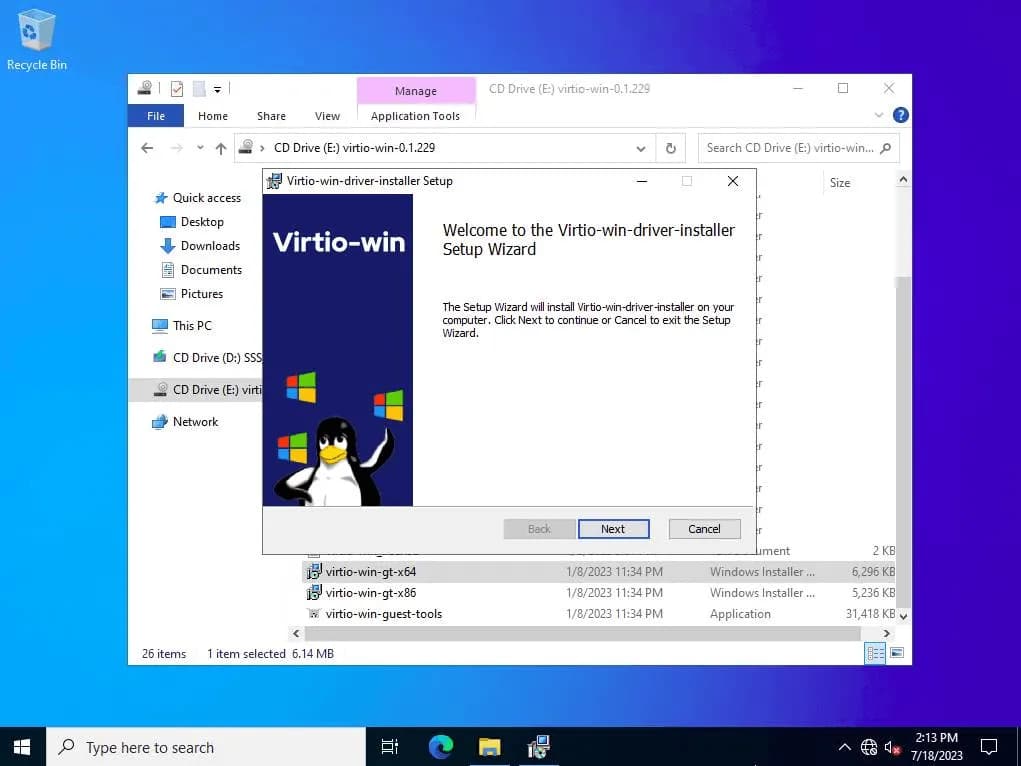
Keep clicking on the Next button, until the installation is completed. That’s it! You should now have Internet connection:
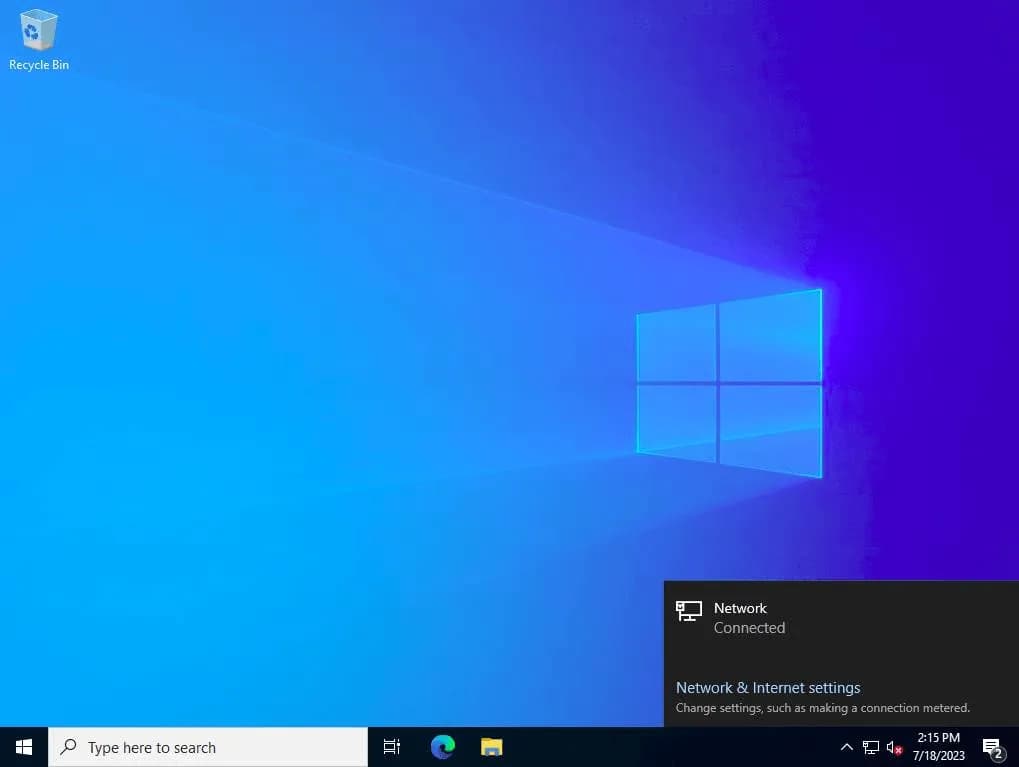
You have successfully installed Windows on your cloud VPS. From here, you can further configure your server by enabling RDP connections from the Server Manager or setting up disk encryption. If you wish to skip over the installation process you can always get a Windows VPS, which comes with Windows Server pre-installed!