PGP email encryption
Learn how to add your OpenPGP public key to your account to ensure that emails that we send regarding your account are encrypted and secure.
PGP email encryption is designed to protect the emails that you receive from us at VPSBG. In order to do this, you will need to add your OpenPGP public key to your VPSBG account via the VPSBG Console. This will ensure that we can encrypt every email that will be sent out to your account's email address so that only you, with the matching private key, can read the content. Additionally, replies from our support team will also be encrypted with the same key.
An account can only hold one single key, covering the current email address. If you are utilizing a different email for your invoices, the invoice copy that will be mailed to that address will not be encrypted. On the other hand, newsletters are also sent without encryption as well as emails that need confirmation for deleting your account.
Password reset emails and the one-time login codes that we send by email are also encrypted. You won't be able to read them without your private key so make sure to keep a backup of it somewhere safe! If you happen to lose them, replace or remove the existing key in your account via the Console while you are still logged in.
Key requirementsCopy link
We accept a key when it meets all of the following:
- It is an ASCII-armored public key, meaning that the block of text starts with
-----BEGIN PGP PUBLIC KEY BLOCK-----. - One of its user IDs contains your account's email address.
- It is not expired or revoked.
You should never paste your private key! We only need the public one - a pasted private key block will automatically be rejected!
How to add your public keyCopy link
Log into the VPSBG Console, click on My Profile in the top right corner and select Security. Next, scroll down to the Email Privacy section. Here you will see the PGP Email Encryption section with your email address and a Not encrypted label next to it. Click Add key.
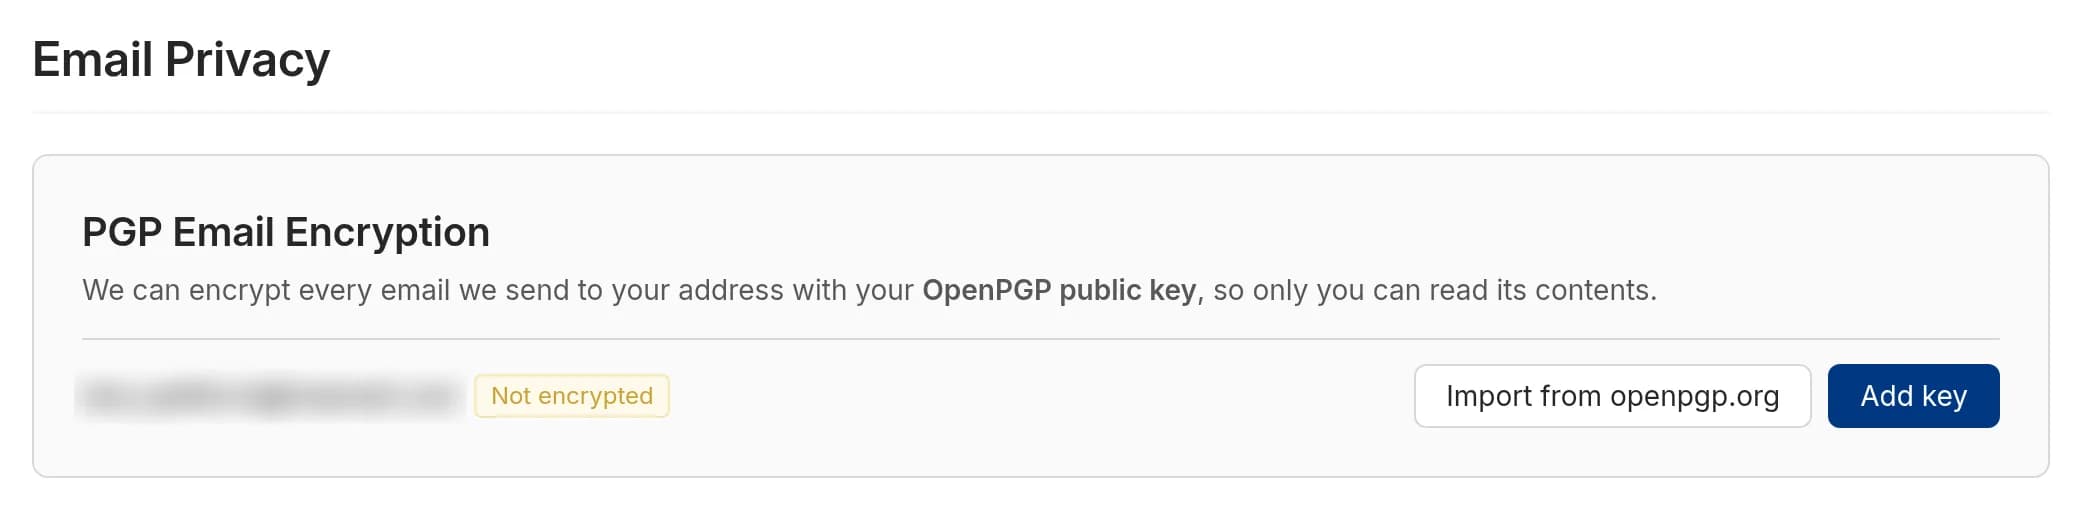
Next, paste your public key into the Add PGP public key window and click on the Save key button.
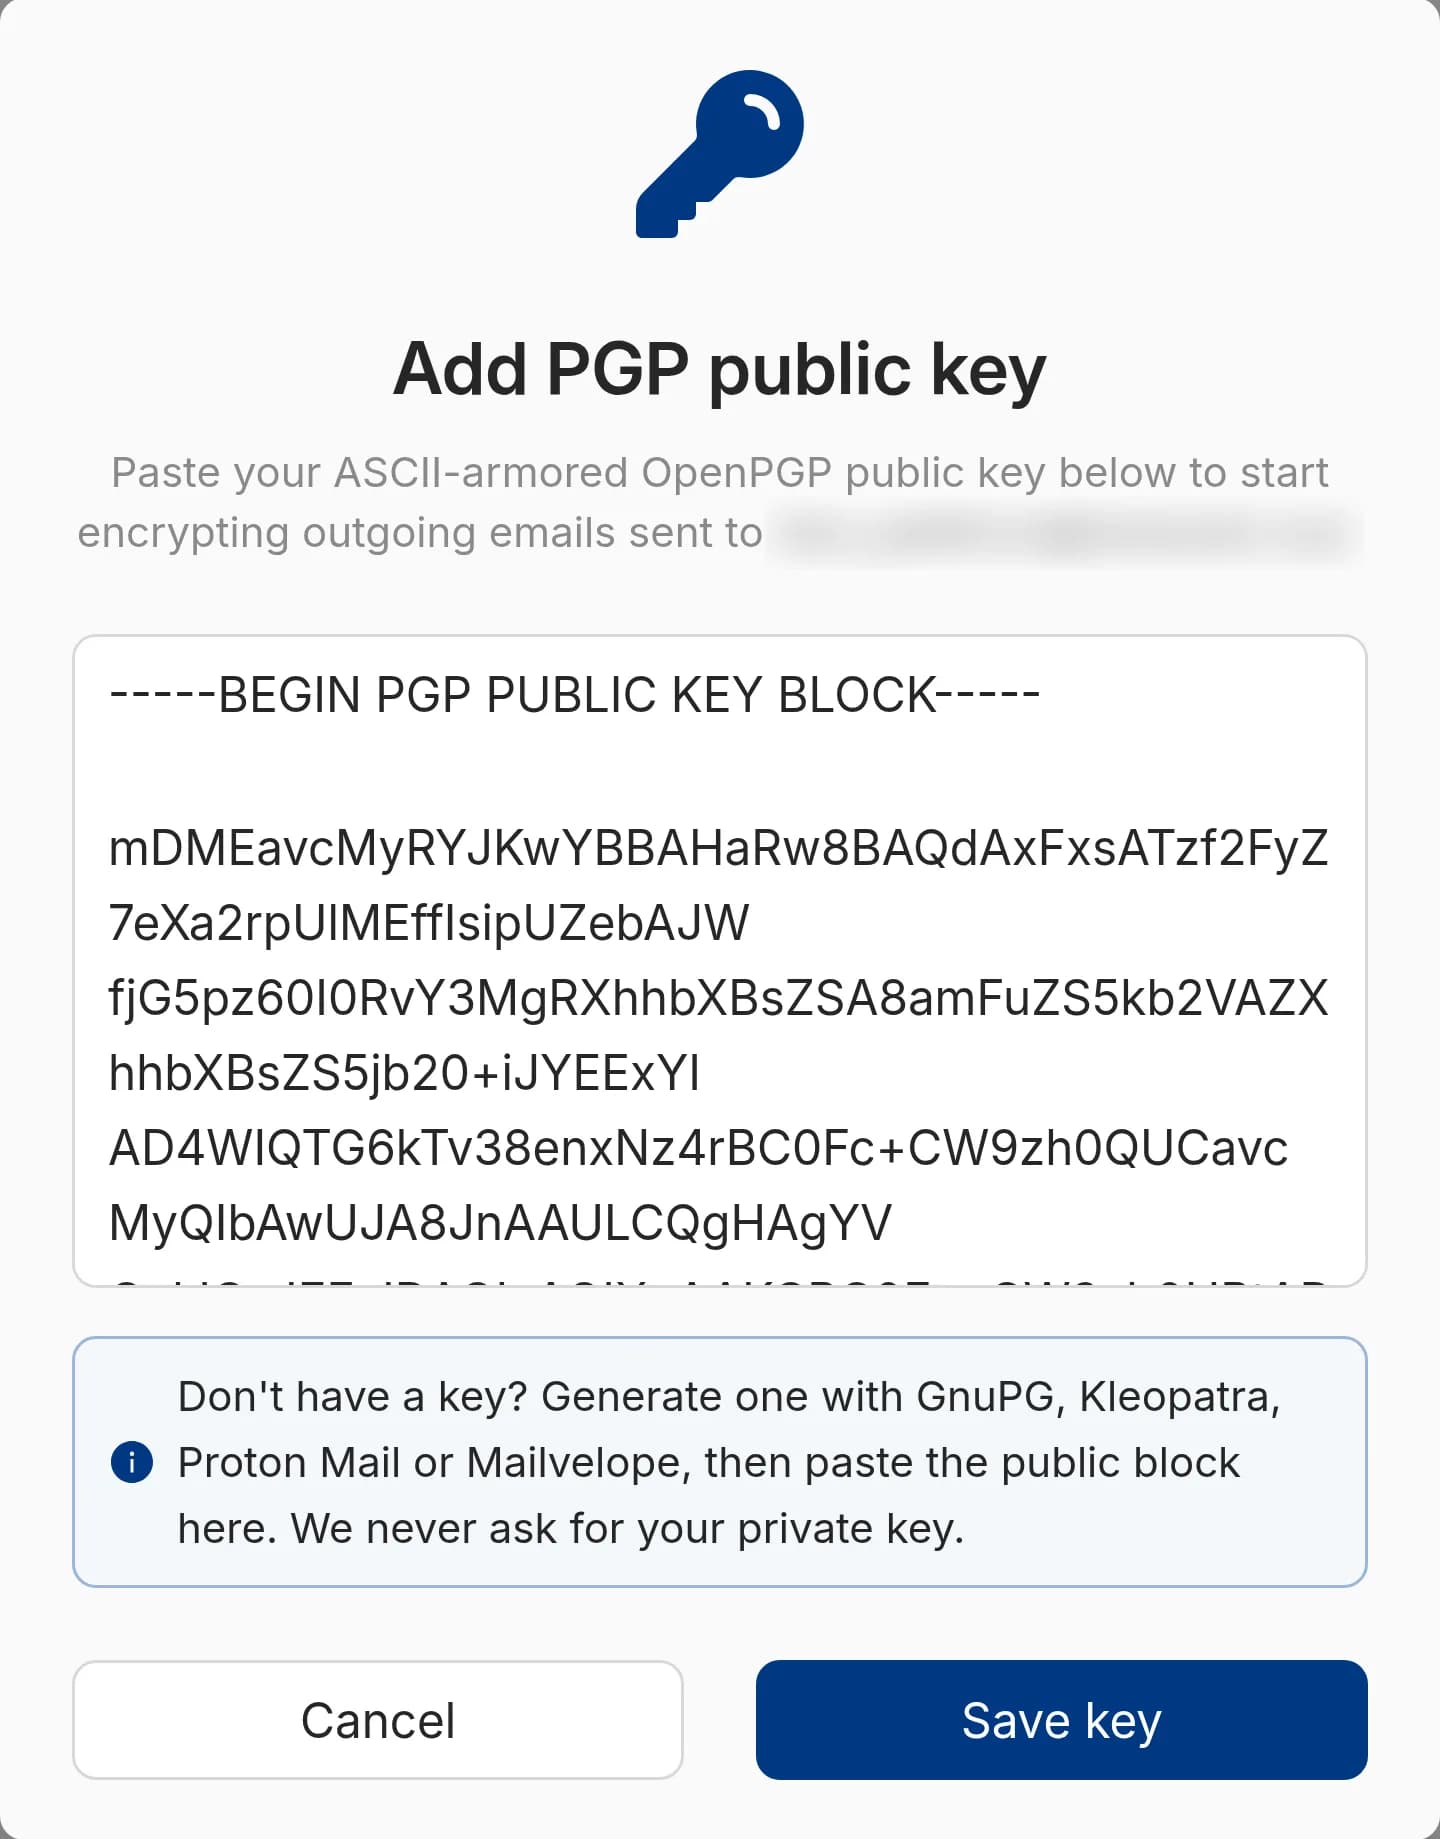
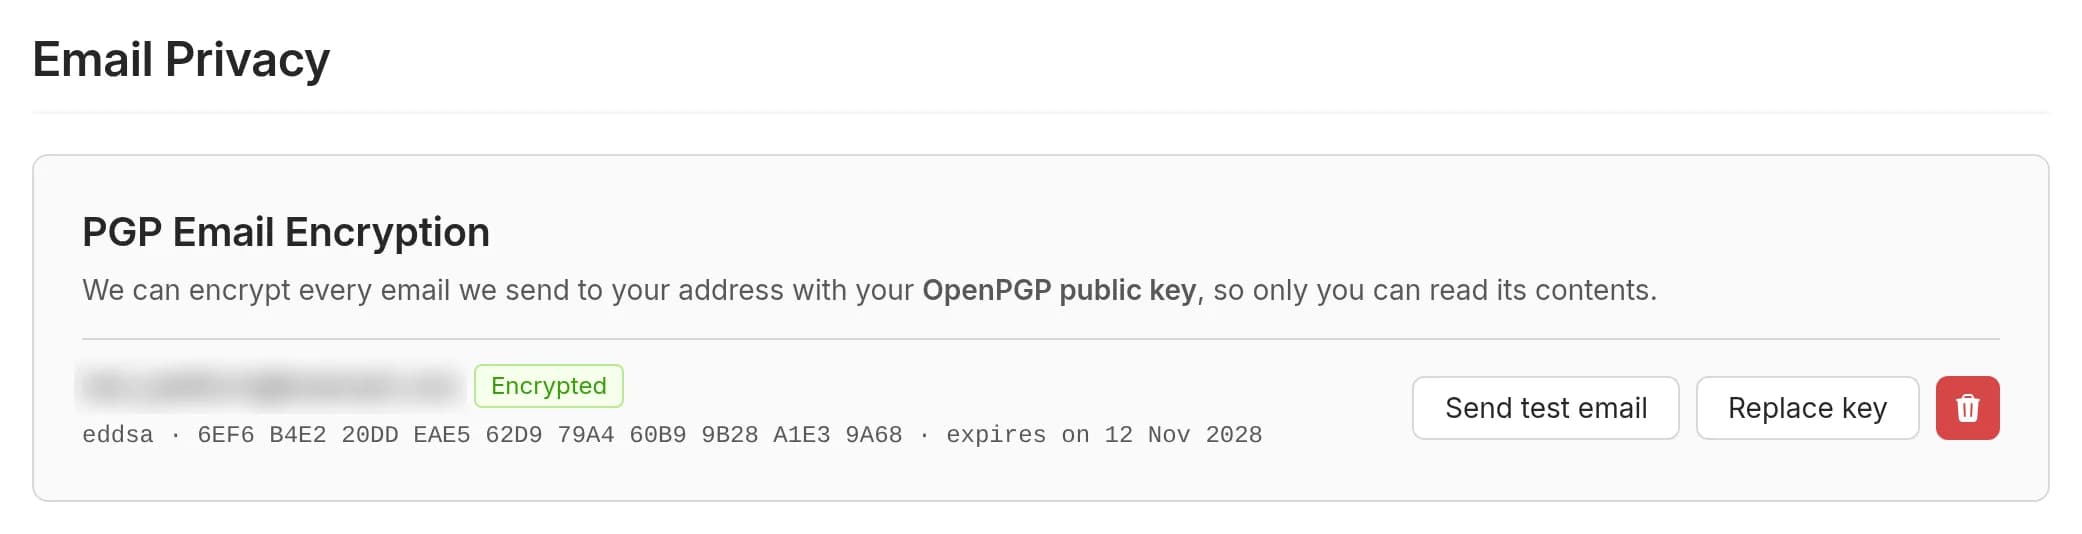
The label will then change to Encrypted and the card will show the key's algorithm, fingerprint and its expiry date if it has one. Make sure to compare the fingerprint with the one that your PGP software shows for your key in order to confirm that we have saved the correct one.
Send the armored key in email_public_key with Register a PGP public key. The token needs the write ability (Authentication).
curl --request POST "https://api.vpsbg.eu/v1/user/pgp" \
  --header "Accept: application/json" \
  --header "Content-Type: application/json" \
  --header "Authorization: Bearer ${VPSBG_API_TOKEN}" \
  --data '{"email_public_key": "-----BEGIN PGP PUBLIC KEY BLOCK-----\n\nmDMEavcMyRYJKwYBBAHaRw8BAQdAxFxsATzf2FyZ7eXa2rpUlMEffIsipUZebAJW\n...\n=UWGQ\n-----END PGP PUBLIC KEY BLOCK-----\n"}'
email_public_key is a JSON string, so every line break in the key is written as \n.
Replace:
- the shortened key block with your whole public key
How to import your key from keys.openpgp.orgCopy link
If you have published your key on keys.openpgp.org and you have verified your email address, we can automatically fetch it for you. The address verified on the keyserver has to match your account's email address and the key has to meet the same requirements as if you were going to be manually pasting.
Again, in the PGP Email Encryption section, click Import from openpgp.org. We will then look up the key published for your account's email address and automatically save it. The label will then change to Encrypted just as if you were adding it by hand.
Call Import a PGP key from the keyserver. The request has no body and it answers 404 when the keyserver has no key for your account's email address.
curl --request POST "https://api.vpsbg.eu/v1/user/pgp/import-from-keyserver" \
  --header "Accept: application/json" \
  --header "Authorization: Bearer ${VPSBG_API_TOKEN}"
How to send a test emailCopy link
In order to test whether encryption is actually working, you have the option to send a test message before the real ones start arriving.
In the PGP Email Encryption section, click on the Send test email button. We will then send a short encrypted message to your account's email address. Open it in your email client and if the message is decrypted, then everything has been set up correctly. If you can't see the contents or you experience any other problems while setting it up, make sure to open a ticket and our support team will assist you.
Call Send a PGP test email. It answers 204 No Content and the message arrives at your account's email address.
curl --request POST "https://api.vpsbg.eu/v1/user/pgp/test" \
  --header "Accept: application/json" \
  --header "Authorization: Bearer ${VPSBG_API_TOKEN}"
How to replace your keyCopy link
To replace a key, just click on the Replace key button. Next, paste your new public key into the Replace PGP public key window and click on Save key. The section will now display your new key's fingerprint.
Send the new key with Register a PGP public key, the same call as in How to add your public key. A different key replaces the one we have stored.
We don't encrypt emails with an expired key! If your key has an expiration date, you will be able to see it in the section. Make sure to update it before it expires otherwise your emails won't stay encrypted.
How to remove your keyCopy link
If you wish to remove an existing key, simply click on the red bin button next to Replace key and confirm with Remove key.
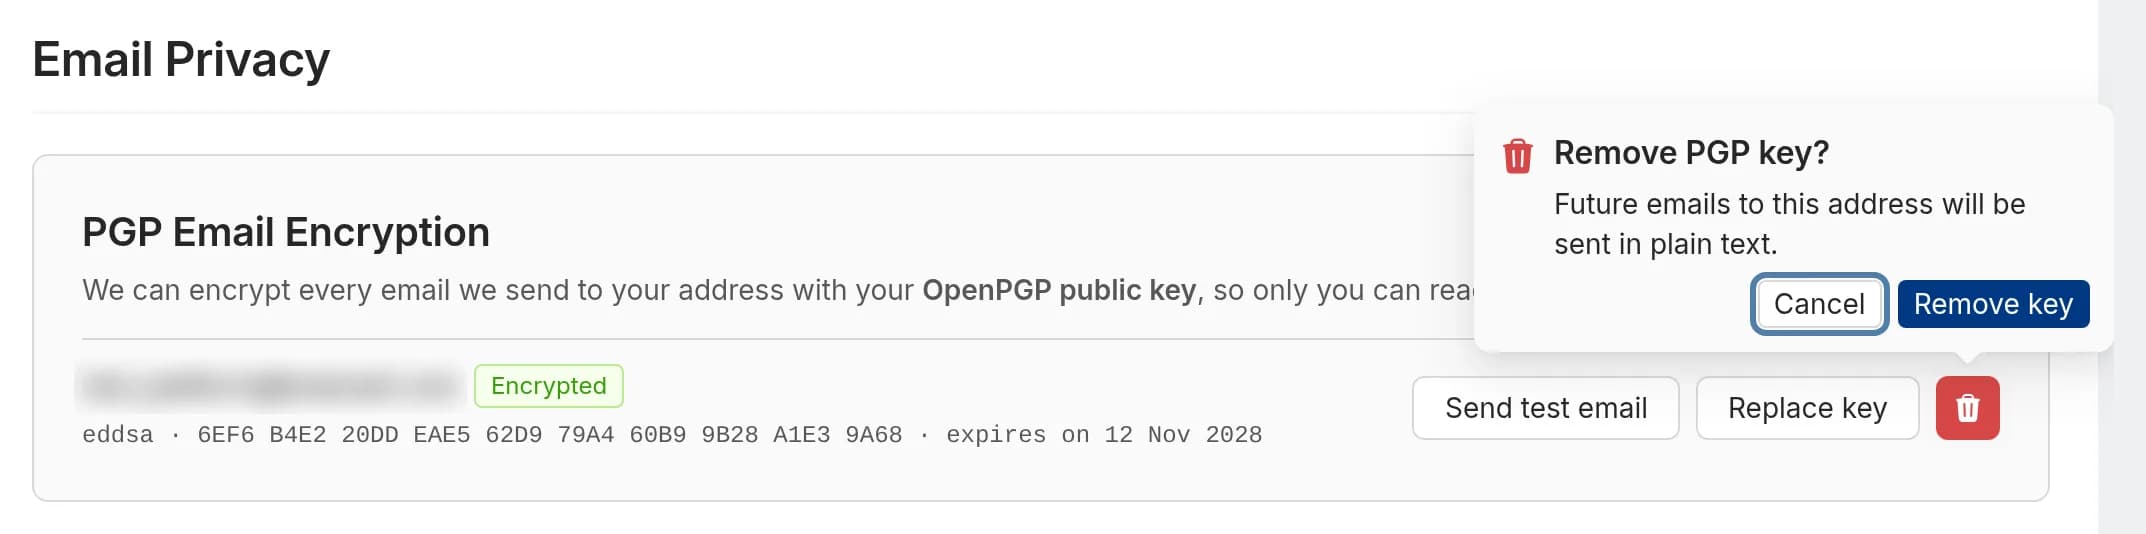
The label will go back to sayting Not encrypted and any emails we send will return to being in plain text.
Call Remove the PGP public key. It answers 204 No Content, and the emails we send you after that are not encrypted.
curl --request DELETE "https://api.vpsbg.eu/v1/user/pgp" \
  --header "Accept: application/json" \
  --header "Authorization: Bearer ${VPSBG_API_TOKEN}"