How to manage a cloud server with n8n
Deploy n8n with the startup-script preset, create the owner account over an SSH tunnel, then update, back up and publish it.
n8n is a powerful, open-source workflow automation tool. It allows you to connect different applications and services to create automated workflows, enabling you to automate repetitive tasks, synchronize data between platforms and build complex processes without writing a single line of code, saving you time and effort.
You can now take advantage of the n8n preset in the startup script section of the configurator to get n8n up and running on your server when it first boots. With the help of the startup script, you will automatically get Docker and n8n during the server's first boot. Additionally, n8n listens on the server's loopback address only, meaning that nobody can access the setup wizard before you to ensure security. You access it via an SSH tunnel, then create the owner account and you can publish it on a domain later.
Before you startCopy link
Before you start configuring n8n, make sure that you have:
- A Linux cloud VPS or VDS plan with at least 2 GB of RAM, since the n8n preset requires it.
- Root access over SSH, with the password or the SSH key that you added to the configurator before deploying the server.
- A domain name, but only if you plan to get n8n on the Internet.
How to deploy a server with the n8n presetCopy link
Deploying a server is extremely easy. Just navigate to the VPSBG Console, open the server configurator and pick a Linux server image from the Operating Systems list. Next, scroll down to the Startup script section, click on the Set script button and select n8n from the Popular apps presets. The whole script will then load into the editor, so that you can manually check what it will install and change anything if you need to. Finally, click on the Set script button at the bottom of the panel and complete the order.
You also need to get a hosting plan with at least 2GB of RAM.
The script will then run once, as root, after your password or SSH keys have been applied. While running, you will see a Startup Script Running notice in your server's management page. This notice will remain until the script finishes running, which will take a few minutes because Docker and the n8n image will need to be downloaded first. Once the notice disappears, simply connect over SSH and check that the container is up using this command:
docker ps --filter name=n8n --format '{{.Status}}'You should now see a line starting with Up. The preset will also write its notes, including the tunnel command from the next step, to /root/README-n8n.txt.
How to create the owner account through an SSH tunnelCopy link
By default, n8n listens on 127.0.0.1:5678 only. In order to reach the setup wizard, you will need to forward that port to your computer over SSH first. To do this, start by copying the IP address of your server. You can do that via the VPSBG console, by opening Servers and clicking on the IP address of the server to copy it.
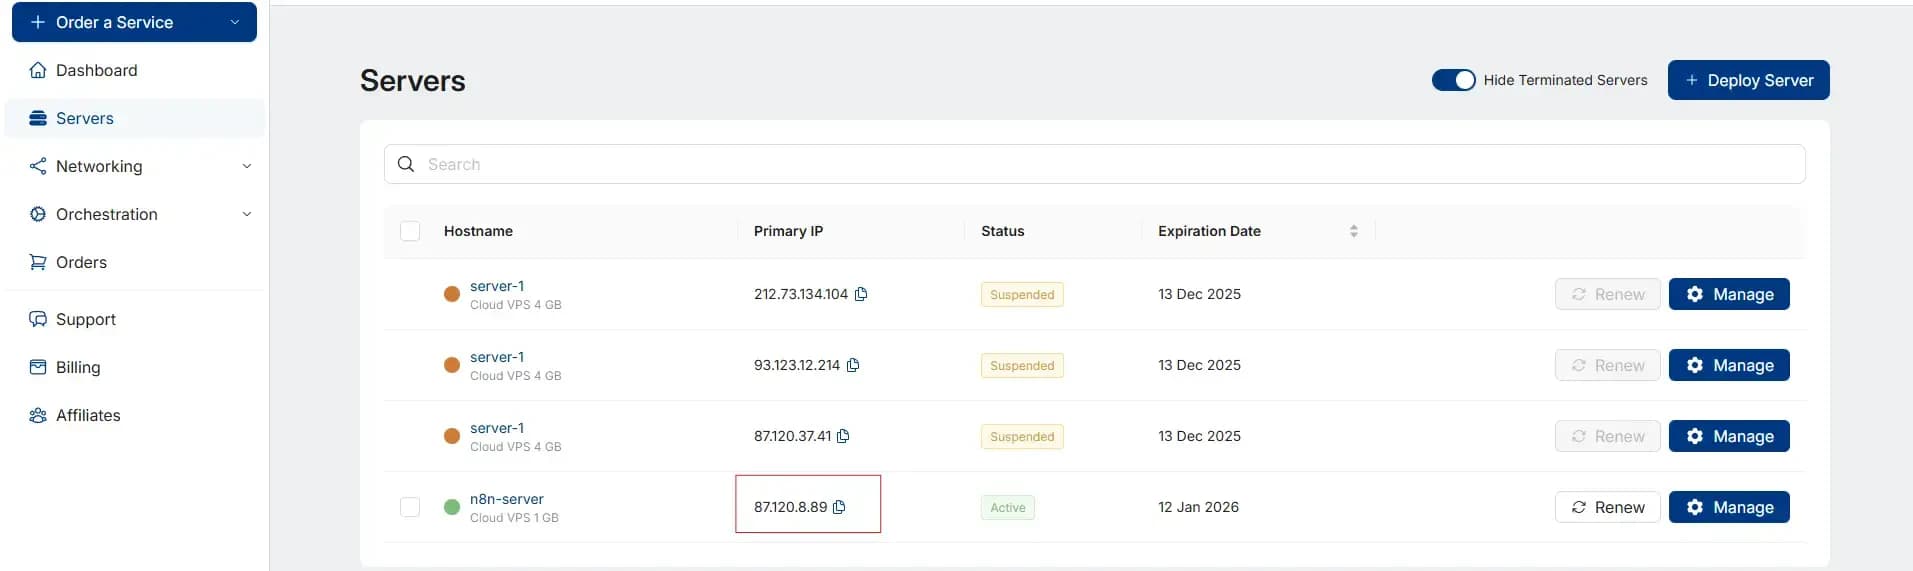
Next, open the tunnel from your computer like so:
ssh -L 5678:127.0.0.1:5678 root@203.0.113.10Make sure to replace 203.0.113.10 with the IP address of your server. While this SSH session stays open, navigate to http://127.0.0.1:5678 in your browser and create your owner account.
Before the owner account is set up, whoever reaches port 5678 first becomes the owner of the instance. That is why the preset keeps n8n on the loopback address! Make sure to create the account over the tunnel before you publish n8n on a domain.
Once you have created the owner account, n8n will be ready to use. You can keep working via the tunnel or publish it on a domain as described at the end of this guide.
How to manage n8n using the command lineCopy link
The n8n preset places the Compose file in /opt/n8n/compose.yaml and the environment file in /opt/n8n/.env. The environment file holds N8N_ENCRYPTION_KEY, the key that encrypts every credential you save in n8n. Your workflows, credentials and execution data live in the Docker volume n8n_n8n_data.
In order to stop n8n, for example before a configuration change, you can use this command:
docker compose -f /opt/n8n/compose.yaml downTo start it again in the background, you can use:
docker compose -f /opt/n8n/compose.yaml up -dTo follow the logs of the running container, utilize:
docker logs -f n8nHow to update n8n to the latest versionCopy link
When it comes to keeping your n8n updated, you just need to pull the newest image and then recreate the container. Your data stays in the volume and won't be lost.
docker compose -f /opt/n8n/compose.yaml pulldocker compose -f /opt/n8n/compose.yaml up -dHow to back up your n8n dataCopy link
In order to back up your data, you will need two things - the data volume and the encryption key. Without the key from /opt/n8n/.env, the credentials inside a restored volume cannot be read.
The following command writes a compressed archive of the data volume into /opt/n8n:
docker run --rm -v n8n_n8n_data:/data -v /opt/n8n:/backup alpine tar czf /backup/n8n-backup-$(date +%F).tar.gz -C /data .Next, check that the archive is there:
ls -laht /opt/n8nIf done correctly, you should see a file like n8n-backup-2026-09-29.tar.gz next to compose.yaml and .env. Copy the archive and the .env file off the server, for example with scp, and keep them somewhere safe. With both files you can easily restore your workflows and credentials onto a fresh n8n instance.
How to publish n8n on a domainCopy link
Webhooks from other services need a public HTTPS address, meaning that n8n has to leave the tunnel. Because the container keeps listening on the loopback address, you will need to put a reverse proxy with a TLS certificate on the same server in front of it, such as Caddy or Nginx with Let's Encrypt.
First, create an A record for your subdomain (for example n8n.example.com) that points to the IP address of your server. Next, set up the reverse proxy to forward https://n8n.example.com to http://127.0.0.1:5678.
After that, edit /opt/n8n/compose.yaml and change the n8n environment by setting N8N_HOST to n8n.example.com, N8N_PROTOCOL to https, WEBHOOK_URL to https://n8n.example.com/ and removing the N8N_SECURE_COOKIE line. Then, apply the change:
docker compose -f /opt/n8n/compose.yaml up -dMake sure to replace n8n.example.com with your own subdomain in every step. Once the DNS record has propagated and the proxy holds its certificate, n8n can be accessed at https://n8n.example.com.